The Best Way To Add Vintage Flair To A New Home: Chair Railings

How-to-Install-Chair-Rail

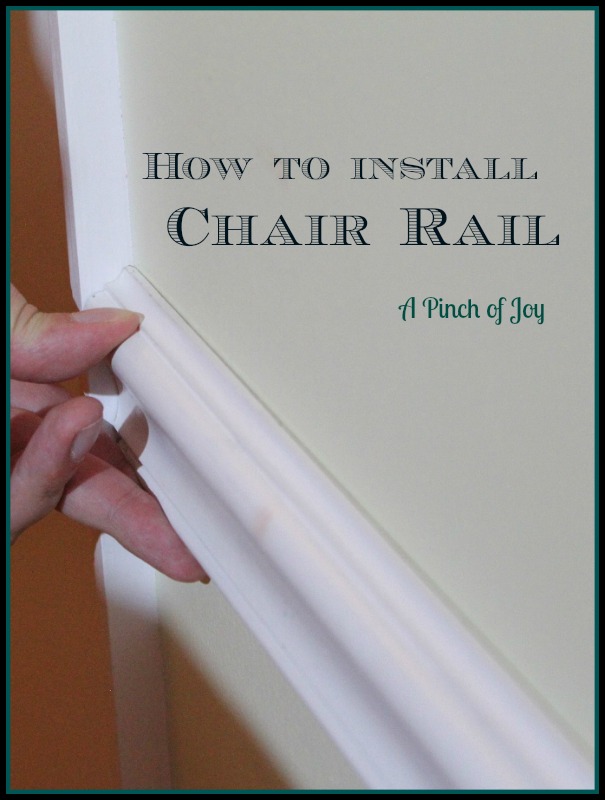
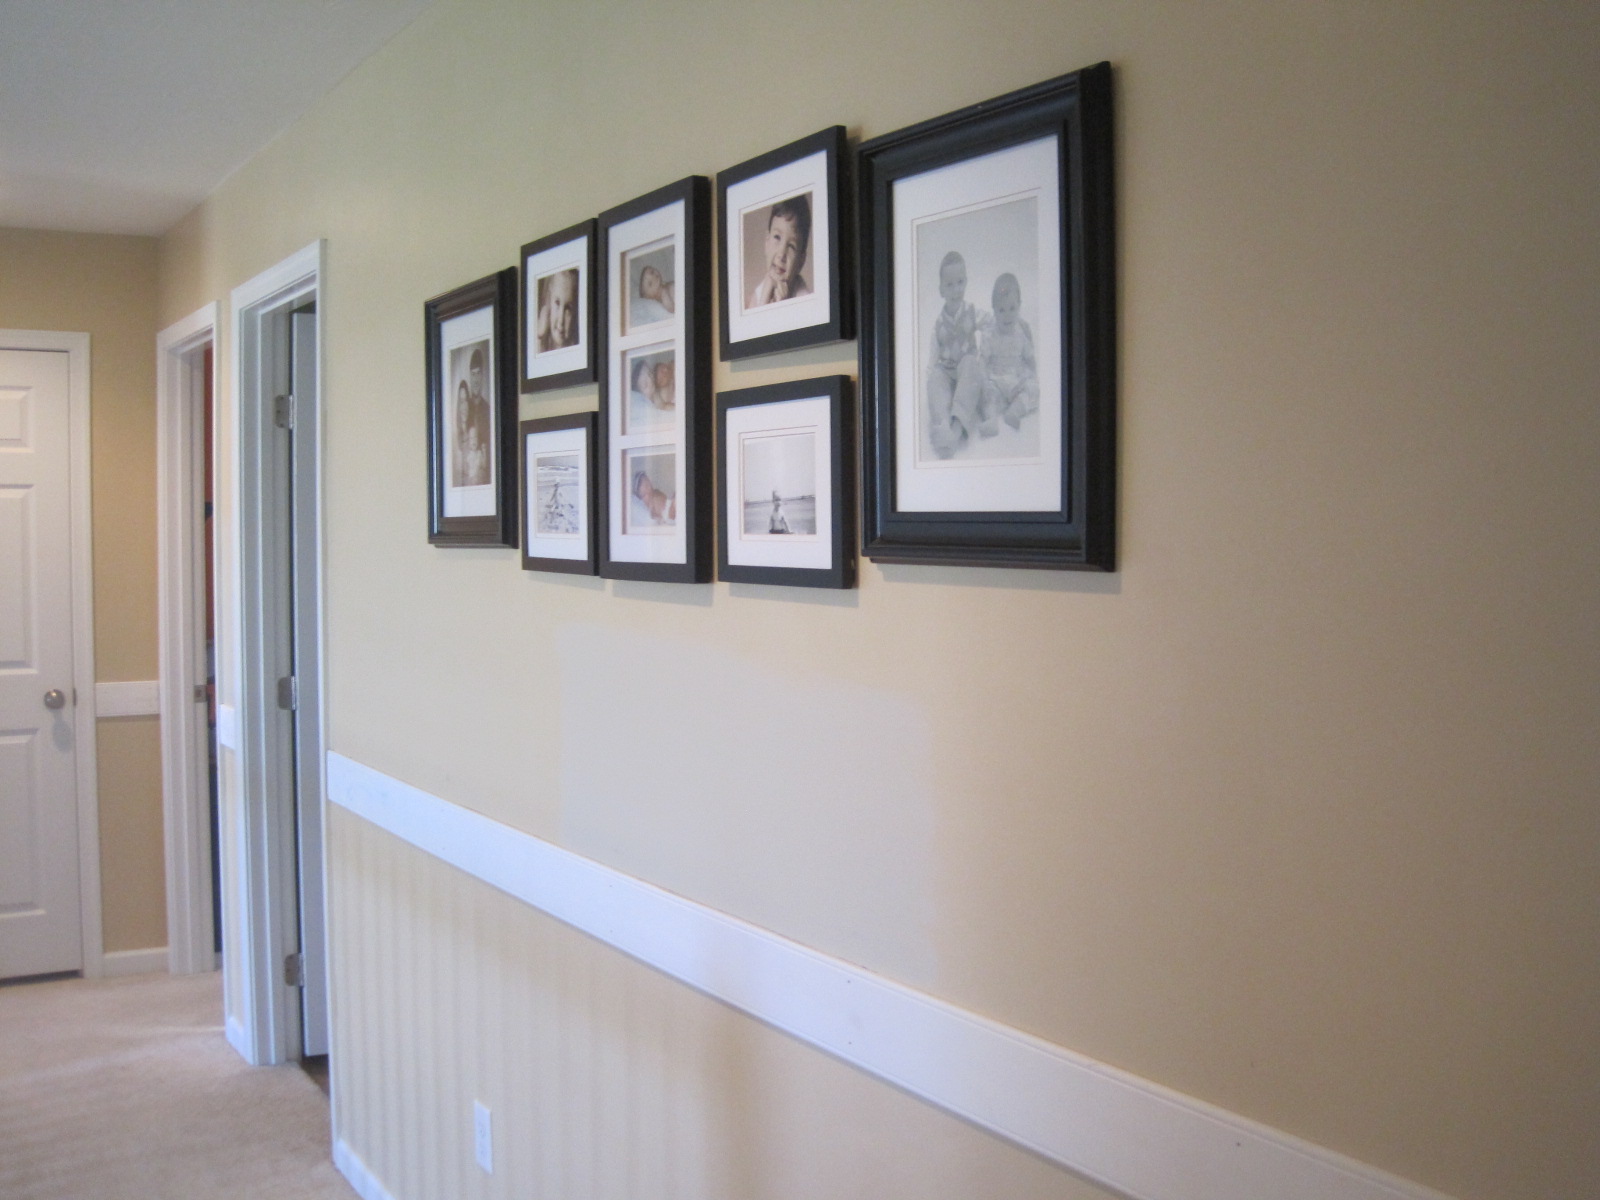
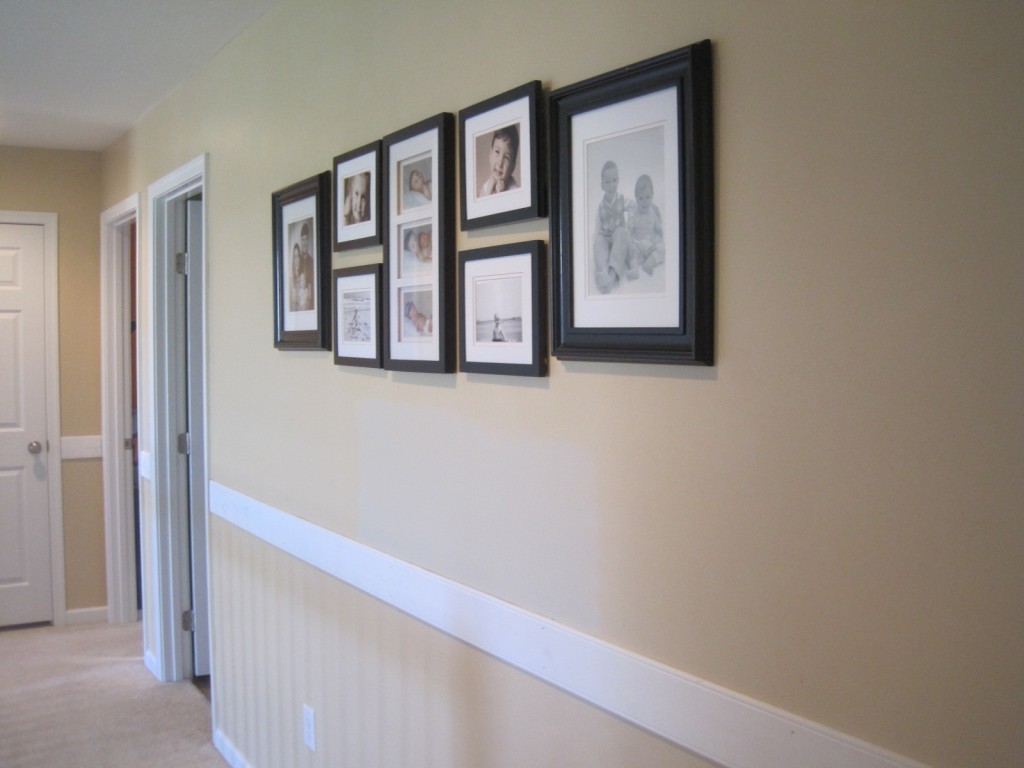
New homes, no matter how pristine or innovative, often miss that vintage charm. Well, look no further than installing a chair rail to bring class back to the dining room. Follow this simple tutorial from A Pinch Of Joy about how to install a chair railing in any room and recreate the glamour of yesteryear with the convenience of the 21st century.

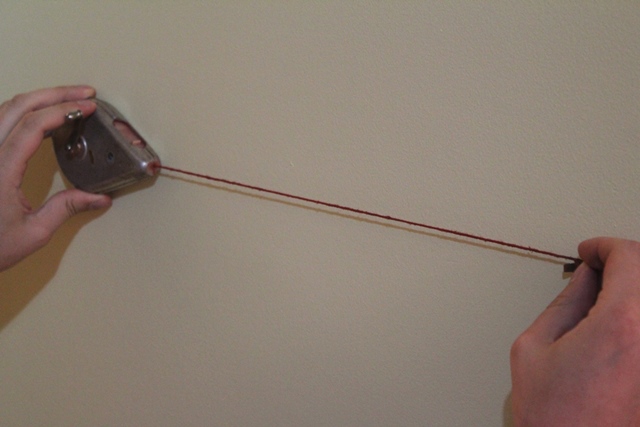
Start by measuring the lengths of the walls in the selected room. Determine the longest run in the room and purchase all moulding and trim in this length (8ft, 10ft or 12ft).

Once the moulding and trim are bought, measure 38.5 inches from the floor up the wall. Then draw a line across the whole length of the wall, using a carpenter’s or laser level to double check that the line is straight.

chalk-line

To begin installing, start at an inside corner. Measure this to the door, window or following corner and begin making cuts to the molding and trim as necessary. Doors and windows require straight cuts, inside corners require 45-degree angles and outside corners require 30-degree angles. Then start to nail! Putting the trim above or below the line drawn, apply a nail to moulding or trim every 12 to 18 inches. Repeat until the whole room is surrounded in chair rail!

Chair-Rail4

For the finishing touches, fill the nail holes with caulk or joint compound. After the material dries, sand the chair rail smooth. Finally, paint the chair rail in the desired color.

When done, host a dinner party and watch guests be impressed by an old world charm in a brand new home.

IMG_3523

Freshen Up A Wall-Mounted TV, Add A Frame!

Screen Shot 2015-04-29 at 12.18.49 AM

No matter how fancy or hi-tech a TV is, it will always just be another household appliance. To make a TV into a moving image art piece, consider framing the screen with this easy home project from Remodelaholic.

Start by gathering items from the hardware store or local lumber yard:

  • Recycled wood boards
  • 4 wooden corner blocks
  • Drill
  • Nails
  • Hammers

IMG_0525_thumb

To begin the project, cut the four wood boards for the sides of the frame. Lay down 4 wooden corner blocks on the outside corners, and nail through the mitered edges of the frame.

Screen Shot 2015-04-29 at 12.17.21 AM

To add dimension, add bead wood to the inside of the frame. Following this addition, add another set of wood boards to the outside edges of the frame to cover the edges of the TV.

Screen Shot 2015-04-29 at 12.17.40 AM

Finally, drill 6 holes along the top of the frame for the TV’s ventilation. Then all that’s left is to slide the frame over the mounted TV.

Screen Shot 2015-04-29 at 12.18.13 AM

Don’t settle for a great TV, enhance the viewing experience with a stylish, wooden TV frame.

Screen Shot 2015-04-29 at 12.18.36 AM

Even More Eco-Friendly Flooring!

DSC06989

Previously, Chicago Handyman gave some tips on installing cork flooring, a very eco-friendly option indeed. Ready for an even cheaper, more eco-friendly flooring? Brown Paper Bags!

Sure, it sounds a little bit like a kindergarten art project, but it is actually a great floor and puts those lunch sacks to use.

To start, gather these materials:

  • Brown craft paper/brown paper bags
  • Gallon of Elmer’s Glue
  • Small bucket
  • Paint brush
  • Roller tray
  • Stain
  • Floor Grade Polyurethane
  • 3″ chip brush

While this may seem like a long list, it’s actually pretty affordable at under $100 and can be used for up to two or three rooms.

Wood-filler

Following shopping, prepare the floors for the material. Whether this means pulling up ratty carpet or shorty wood, do so. Then sand down any high spots in the subfloor, removing nails and filling in any gaps.

Once the subfloor is prepped, begin tearing up pieces of the brown paper, separating straight edged ones from the more choppy. These pieces should be between 6″-12″ diameter and once torn, balled up and put aside until application.

Brown-paper-Decoupage

With the Elmer’s Glue ready, begin to paint the first area on the floor with the glue and then put 5-6 paper balls in the glue mix. Dunk them quickly, squeeze them and set them aside until they reach the floor.

Then start laying the pieces! For a more natural look, overlap the pieces bit by bit. Make sure to watch out for tears or inconsistencies.

Finally, using an extension pole, apply the stain and poly to the new flooring. This will be the longest part of the process because both steps need ample time for drying.

When dry, this green, durable flooring will not only help the environment, but ignite dinner party conversation.

Stained-Paper-Floor

Need more details? Check out Lovely Crafty Home for a step-by-step guide.

Looking for more flooring? Call Chicago Handyman for a quote on floor installation today!