Fence Post Repair: When Your Yard’s Backbone Needs a Chiropractor

Ah, fence post repair – the thrilling hobby that keeps homeowners on their toes and neighbors peeking over the fence in curiosity. Who knew a wobbly post could cause such excitement in the neighborhood?

To fix a damaged fence post, you’ll need to dig around it, remove the old concrete, and set a new post in fresh concrete. It’s like giving your fence a spa day, complete with a mud bath and a fancy new outfit. But don’t worry, your fence won’t be demanding cucumber slices for its eyes anytime soon.

Repairing fence posts is crucial for maintaining privacy and safety. After all, no one wants their secret backyard dance parties exposed to the world or their prized petunias trampled by wandering wildlife. So grab your shovel and put on your handyman hat – it’s time to become the fence whisperer your neighborhood never knew it needed!

Getting Down and Dirty with Diagnosis

Fence problems can sneak up on you like a ninja in the night. But fear not! With a keen eye and a dash of detective work, you’ll crack the case of the wonky fence faster than you can say “timber!”

Identifying Common Culprits of Fencing Follies

Picture this: you’re strolling through your yard, sipping your morning coffee, when suddenly – bam! Your fence looks like it’s doing the limbo. What gives? Wood rot is often the sneaky villain here, munching away at your posts like termites at an all-you-can-eat buffet.

But wait, there’s more! Broken posts can also be party crashers. They might snap under the weight of that neighbor kid who thought your fence was a jungle gym. Oops!

Don’t forget about the silent killer: moisture. It’s like a bad houseguest that overstays its welcome, causing posts to swell, warp, and eventually give up the ghost.

Learning from Leaning: The Slope of Despair

Ah, the leaning fence – it’s not trying to recreate the Tower of Pisa, we promise. This tipsy timber trouble often stems from poor installation. Maybe the post holes weren’t deep enough, or someone got a bit too excited with the backfill.

Soil erosion can also be a pain in the pickets. It’s like Mother Nature decided to play a game of “let’s move the earth” without telling your fence.

And let’s not forget our friend, the wind. Those gusty gales can turn your fence into a sail, pushing it over time until it’s waving hello to the ground. Time to batten down the hatches, matey!

Fix It Like a Pro: Repair and Reinforcement Rundown

A person uses a shovel to dig a hole around a broken fence post. They then insert a new post and use a level to ensure it is straight before adding concrete for reinforcement

Fence posts can be a real pain in the grass. But fear not! With these pro tips, you’ll have your fence standing tall and proud in no time.

The Mighty Wood Fence Post Makeover

Wood fence posts love to play hide and seek with rot. Sneaky little devils! First, give that post a good poke. If it’s softer than grandma’s apple pie, it’s time for action.

Grab your trusty reciprocating saw and cut out the rotted part. Now, slide in a repair bracket from your local home improvement store. It’s like a splint for your fence!

Secure it with lag bolts and voila! Your fence post is now tougher than a two-dollar steak. For extra oomph, slap on some wood preservative. Take that, future rot!

Concrete Base Camp: Setting a Solid Foundation

Time to get dirty! Dig a hole deeper than your neighbor’s conspiracy theories. Pour in some gravel for drainage. Your post will thank you later.

Mix up some concrete – it’s like making a really tough cake. Pour it in, leaving room at the top for soil. Stick in your post and use a level. Nobody likes a tipsy fence!

Let it set overnight. In the morning, fill the rest with soil. Congrats! You’ve just created a concrete footing that’ll outlast your gym membership.

The Vinyl Solution: Patching Up Your Plastic Pal

Vinyl fences think they’re invincible, but they can crack under pressure too. For small cracks, grab some vinyl fence repair kit. It’s like makeup for your fence!

Clean the area, apply the patch, and smooth it out. For bigger boo-boos, you might need to replace a whole section. It’s like swapping out Lego pieces, but bigger.

Don’t forget to check the tension bar. If it’s looser than your Uncle Bob’s dance moves, tighten it up. A snug fence is a happy fence!

Accessorize and Stylize: The Finishing Touches

Now for the fun part – dressing up your fence! Post caps are like little hats for your posts. They’re not just pretty, they keep water out too.

Paint or stain wooden posts to match your mood. Feeling blue? Go for it! Want to blend in? Earth tones are your friend.

For vinyl, a good wash can work wonders. It’s like a spa day for your fence. Just don’t let the neighbors catch you singing to it while you work!

Bathroom Remodel Financing: Easy Ways to Upgrade Your Space

Thinking about giving your bathroom a makeover? The cost can add up fast. But don’t worry – there are lots of ways to pay for it without breaking the bank. From personal loans to home equity options, you’ve got choices.

Many homeowners use personal loans or home equity to finance their bathroom remodels. These options let you borrow money based on your credit or home value. You can often get the cash quickly and use it however you want for your project.

Some people also look into special credit cards or lines of credit for home improvements. These can give you flexibility to pay as you go. The key is finding the right fit for your budget and plans. With some research, you’ll be on your way to that fresh new bathroom in no time.

A bathroom with modern fixtures and a sleek design. A contractor discussing financing options with a homeowner

Understanding Bathroom Remodel Financing

Bathroom remodel financing offers several ways to pay for upgrades. Homeowners can choose from different loan types based on their needs and financial situation.

Exploring Secured vs. Unsecured Financing Options

Secured loans use your home as collateral. This means lower interest rates but more risk. Unsecured loans don’t need collateral. They have higher rates but less risk to your home.

Secured options include home equity loans and lines of credit (HELOCs). These tap into your home’s value. Unsecured choices are personal loans or credit cards. They’re based on your credit score.

Home equity loans give you a lump sum. HELOCs let you borrow as needed. Both have competitive rates. Personal loans offer quick approval but higher rates. Credit cards are fast but costly long-term.

Evaluating Home Equity Options

Home equity loans and HELOCs use your house as security. They often have lower rates than other choices. You can borrow up to 85% of your home’s value minus what you owe.

Home equity loans give you all the money at once. You pay it back in fixed amounts. HELOCs work like a credit card. You can borrow and repay as needed during the draw period.

Both options usually have long repayment terms. This can mean lower monthly payments. But remember, you risk losing your home if you can’t repay.

Finding the Right Loan for Your Remodel

The best loan depends on your project, budget, and credit. A personal loan might work for small updates. Larger remodels may need a home equity option.

Compare interest rates and terms from different lenders. Check if there are fees or penalties. Think about how long you’ll need to repay the loan.

Consider your credit score. Better scores mean better rates. If your score is low, work on improving it before applying. Some lenders offer bathroom remodel loans. These are personal loans designed for home projects.

Remember to borrow only what you need. Don’t take on more debt than you can handle. A smart financing choice can make your bathroom dreams come true without breaking the bank.

Planning Your Bathroom Remodel Financing

A homeowner sits at a desk with a calculator, budget spreadsheet, and various financing options laid out, contemplating their bathroom remodel project

Getting your bathroom remodel financing right is key. It affects how much you can spend and how long you’ll be paying it off. Let’s look at some important factors to consider.

Credit Considerations and Interest Rates

A person’s credit score plays a big role in bathroom renovation financing. A good credit score can lead to lower interest rates. This means less money paid over time. Someone with a lower score might face higher rates.

Interest rates vary between lenders. It’s smart to shop around. Fixed interest rates stay the same over time. This makes monthly payments predictable. Variable rates can change, which might save money but also adds risk.

Lenders also look at a person’s debt-to-income ratio. This shows how much of their income goes to debt payments each month. A lower ratio can help someone qualify for better loan terms.

Understanding the Impact of Loan Details

Loan details can make a big difference in the long run. Repayment terms affect how long someone will be paying off their loan. Longer terms mean lower monthly payments but more interest paid overall.

Some loans have closing costs. These are fees paid upfront to get the loan. They can add to the total cost of financing a bathroom remodel.

Here’s a simple breakdown of how loan terms can affect costs:

Loan TermMonthly PaymentTotal Interest Paid
5 yearsHigherLower
10 yearsLowerHigher

It’s important to find a balance that fits your budget and goals.

Alternative Financing Methods

Several ways exist to finance a bathroom remodel beyond traditional loans. A cash-out refinance lets homeowners borrow against their home’s equity. This can offer lower interest rates than other options.

Credit cards with 0% APR can be useful for smaller projects. They allow interest-free borrowing for a set time. But it’s crucial to pay off the balance before the promotional period ends.

For bigger projects, some might consider an FHA 203(k) loan. This combines the cost of buying or refinancing a home with the cost of renovations. It can be a good choice for fixer-uppers.

Personal loans are another option. They don’t require collateral and can be approved quickly. But they often have higher interest rates than secured loans.

Sliding Glass Door Repair: When Your View Becomes a Sticky Situation

Is your sliding glass door acting more like a stubborn mule than a smooth operator? Many homeowners find themselves battling with sticky tracks, broken rollers, or cracked panes.

A man servicing a large sliding glass door on a rooftop deck in an urban setting with a city skyline in the background. He is kneeling and using tools, wearing gloves, a collared shirt, and dark work pants. The rooftop deck is modern, with the glass door leading to an interior space under renovation. The worker is focused on adjusting the door, with a vibrant city view of buildings, streets, and skyscrapers behind him.

Fixing a sliding glass door often involves cleaning the track, lubricating moving parts, adjusting rollers, or replacing damaged components. With a little elbow grease and know-how, that ornery door can be gliding like a figure skater on ice in no time.

For those who’d rather leave it to the pros, there are experts who specialize in sliding door repair. They come armed with tools, replacement parts, and an uncanny ability to sweet-talk even the most uncooperative doors into submission. Whether it’s a DIY adventure or a job for the specialists, a smooth-sliding door is just around the corner.

Diagnosing Your Slippy Slidey Glass Door Woes

Sliding glass doors can be tricky beasts. One day they’re smooth as butter, the next they’re stuck like your Uncle Bob after Thanksgiving dinner. Let’s dive into the common culprits behind these pesky problems.

Roll on, Sliders! Examining Rollers and Tracks

The unsung heroes of sliding doors are the rollers and tracks. When these little guys get gunked up, your door turns into a stubborn mule. Time for a track inspection!

First, give that track a good once-over. Is it dirtier than a toddler’s hands after finger painting? Break out the vacuum and show that grime who’s boss. A clean track is a happy track.

Next up, the rollers. These wheel-y important parts can wear down faster than your patience on a Monday morning. If they’re looking sad and flat, it might be time for new sliding glass door rollers.

Adjusting roller height can work wonders too. Just find those adjustment screws at the bottom and give ’em a twirl.

Cracked Glass? No Biggie!

Uh-oh, did someone’s wild party trick go awry? A cracked sliding glass door doesn’t have to mean game over.

For tiny cracks, a clear nail polish can be a temporary fix. But don’t get too excited – this is just a band-aid solution.

Bigger cracks? Time to call in the pros. Glass repair experts can work magic on your damaged door. They’ll have it looking brand new faster than you can say “oops, my bad!”

Remember, safety first! Cracked glass can be sharper than your grandma’s wit. Don’t try to remove it yourself unless you fancy a trip to the ER.

Locks & Security: More than Just Keeping In-Laws Out

A wonky lock on your sliding glass door is about as useful as a chocolate teapot. It’s not just about keeping nosy neighbors out – it’s about peace of mind.

First, check if the lock aligns properly when the door closes. If it’s off, adjusting the door’s position might do the trick.

If the lock itself is broken, don’t panic. Replacing a lock is easier than explaining why you need privacy settings on your social media to your mom. Most hardware stores carry replacement locks.

For extra security, consider adding a security bar.

Energy Efficiency: Because Your Wallet Deserves a Break

Is your sliding glass door letting in more drafts than a badly written novel? Time to seal the deal on energy efficiency!

Check the weatherstripping around your door. If it’s seen better days, replacing it can make a world of difference.

Consider upgrading to double-pane windows. They fight off heat and cold better than any superhero.

Energy-efficient glass coatings are another nifty trick. They reflect heat, keeping your home cooler in summer and warmer in winter.

Don’t forget about the gap at the bottom of the door. A door sweep can help seal it up tighter than your lips when asked about your ex.

The Great Glass-pectations: Repair or Replace?

A technician carefully examines a sliding glass door, assessing the damage and deciding whether to repair or replace it

Sliding glass doors can be a real pane in the glass when they don’t work right. But fear not! There are ways to fix these transparent troublemakers without breaking the bank or your sanity.

When to Call in the Glass Doctor

Is your sliding door giving you the cold shoulder? Time to ring up the Glass Doctor! These experts can diagnose door dilemmas faster than you can say “shattered dreams.” They’ll check for cracks, chips, and foggy views.

If the glass looks like a spider’s art project, replacement might be the way to go. But don’t despair! Sometimes a simple repair can save the day (and your wallet).

Glass Doctors are available 24/7 for emergencies. Because let’s face it, broken glass waits for no one.

Roller Replacement: It’s How We Roll

Squeaky wheels might get the grease, but stubborn rollers need a whole new lease on life.

First, lift the door off its track. It’s a bit like wrestling an elephant, so grab a buddy. Pop out the old rollers and slide in the new ones. Voila! Your door will glide smoother than a penguin on ice.

Pro tip: Clean the tracks while you’re at it. A little TLC goes a long way in preventing future door drama.

Screen Savers: When the Internet Won’t Help

Torn screens are like Swiss cheese – full of holes and not very good at keeping bugs out. But fear not! Screen repair is easier than teaching your grandma to use a smartphone.

The Swing of Things: Dealing with Swinging Doors

Swinging doors that won’t stay put are like rebellious teenagers – they need some guidance. Start by tightening loose hinges. A screwdriver can work wonders!

If the door is still doing its own thing, check the alignment. A misaligned door is like a bad haircut – noticeable and annoying. Adjust the strike plate or add shims to get things back on track.

For doors that refuse to close, a new weatherstrip might do the trick. It’s like giving your door a cozy blanket to snuggle into.

How to Repair Cracks in Drywall: Patch Up Your Life and Your Walls

Got a crack in your drywall? Don’t despair, your walls aren’t falling apart! These pesky fissures are just your house’s way of saying “I’m alive!”

Drywall cracks pop up for all sorts of reasons. Maybe your home is settling into its golden years, or perhaps it’s just cranky about temperature changes. Fixing these cracks is easier than convincing a cat to take a bath.

With a quick trip to Home Depot and some elbow grease, anyone can patch up their walls. It’s like giving your house a facelift, minus the celebrity price tag. So grab your tools and get ready to become the superhero your drywall never knew it needed!

Gathering Your Drywall Repair Kit

Before diving into drywall repair, one must assemble the proper tools. A well-stocked kit is like a superhero’s utility belt, ready to tackle any crack or hole that dares to mar your walls.

Identifying Your Wall’s Mood Swings require the proper tools

Walls, like teenagers, can be moody and unpredictable. One day they’re smooth and flawless, the next they’re cracking up at the slightest joke. To diagnose these fickle surfaces, a keen eye and a few key tools are essential.

A stud finder becomes your wall’s therapist, uncovering hidden support structures. It beeps and blinks, revealing the secrets lurking behind the drywall’s poker face.

The utility knife, sharp and precise, acts as a surgeon’s scalpel. It trims away damaged areas with the finesse of a barber giving a buzz cut.

A Shopping Spree at Home Depot

Venturing into the home improvement store is like entering a candy shop for DIY enthusiasts. The aisles beckon with promises of smooth walls and victorious repairs.

Joint compound, the magical spackle of the drywall world, sits proudly on the shelf. It’s the cure-all for cracks, holes, and dents.

Drywall tape comes in various flavors: paper, fiberglass, and mesh. Each type has its own personality, ready to stick it to those pesky cracks.

Drywall screws stand at attention, eager to fasten loose panels and secure wobbly walls.

Befriending Your Putty Knife

The putty knife is the unsung hero of drywall repair. It spreads joint compound like butter on toast, smoothing over life’s little imperfections.

Putty knives come in different sizes, from dainty 2-inch models to brawny 12-inch beasts. The 4-inch and 6-inch varieties are the Goldilocks of the bunch – just right for most jobs.

A taping knife, the putty knife’s sophisticated cousin, joins the party for larger repairs. It’s wider and more flexible, perfect for spreading compound over seams and tape.

With these tools in hand, even the most intimidating wall cracks will quiver in fear. The drywall repair adventure awaits!

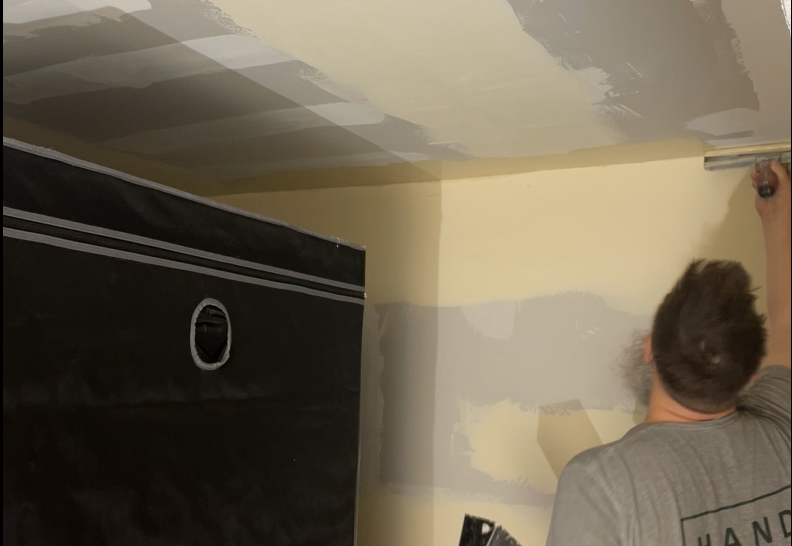
Illustration of a worker repairing a crack in the ceiling drywall. The scene depicts a man in a white work shirt and jeans, using a putty knife to apply joint compound to a significant crack along the ceiling. He is on a stepladder, reaching up to smooth the compound over the crack. The room is bright and simply decorated, with white walls and crown molding. The worker wears a baseball cap and a dust mask for safety, emphasizing the precision and care taken in the repair process.

The Art of Filling Cracks and Holes

Patching up drywall is like being a cosmetic surgeon for your home. It’s all about smoothing out those unsightly blemishes and making your walls look young again.

An Introduction to Drywall Dermatology

Our walls, like our skin, need some TLC from time to time. Cracks and holes are the acne of drywall, and it’s up to us to play doctor. First things first, clean the area. No one likes a dirty patient! Grab a drywall knife and scrape away any loose bits. It’s like exfoliating, but for your walls.

Next, size up the damage. Is it a tiny crack or a gaping hole? For small cracks, a bit of spackle will do the trick. It’s like putting concealer on a pimple. For bigger boo-boos, you might need to break out the big guns: drywall compound and tape.

Wrestling with Mesh vs. Paper Tape

Choosing between mesh and paper tape is like picking your favorite superhero. Both have their strengths, but one might be better suited for your mission. Mesh tape is self-adhesive and great for corners. It’s like Spider-Man, sticking to everything with ease.

Paper tape, on the other hand, is the Superman of drywall repair. It’s stronger and less likely to show through your final coat. But it needs a layer of mud to stick, so it’s a bit more work.

• Mesh tape: Easy to use, good for corners
• Paper tape: Stronger, less visible, needs mud to stick

Mixing Mud with the Finesse of a Baker

Mixing drywall compound is like baking a cake, but way less tasty. You want it smooth, not too thick, not too thin. It’s a Goldilocks situation – just right. Add water slowly, stirring as you go. Think of it as making pancake batter, but for your walls.

Once it’s mixed, let it sit for a few minutes. This gives the ingredients time to get to know each other. Then give it one last stir before you start spreading. Apply it with your drywall knife, smooth and even. It’s like frosting a cake, but vertical and less delicious.

The Final Layer: Sanding Without Tears

Sanding is the last step in our drywall makeover. It’s like giving your walls a spa treatment. Start with a coarse-grit sandpaper to smooth out the big bumps. Then switch to a finer grit for that silky-smooth finish.

Here’s a pro tip: wear a dust mask. Unless you want to look like a powdered donut, that is. Sand in a circular motion, like you’re waxing a car. Check your work often by running your hand over the surface. If it feels smooth, you’re done!

Remember, patience is key. Rome wasn’t built in a day, and perfect drywall doesn’t happen overnight. But with a little practice, you’ll be a drywall doctor in no time!

How Many Screws Per Sheet of Drywall: A Quick Guide for DIYers

Hanging drywall is a key step in many home improvement projects. But how many screws do you need for each sheet? It’s a common question that can puzzle both DIY enthusiasts and pros alike.

The general rule is to use about one screw per square foot of drywall.

This means a standard 4×8 foot sheet needs around 32 screws.

The exact number can change based on where the sheet is going and how thick it is.

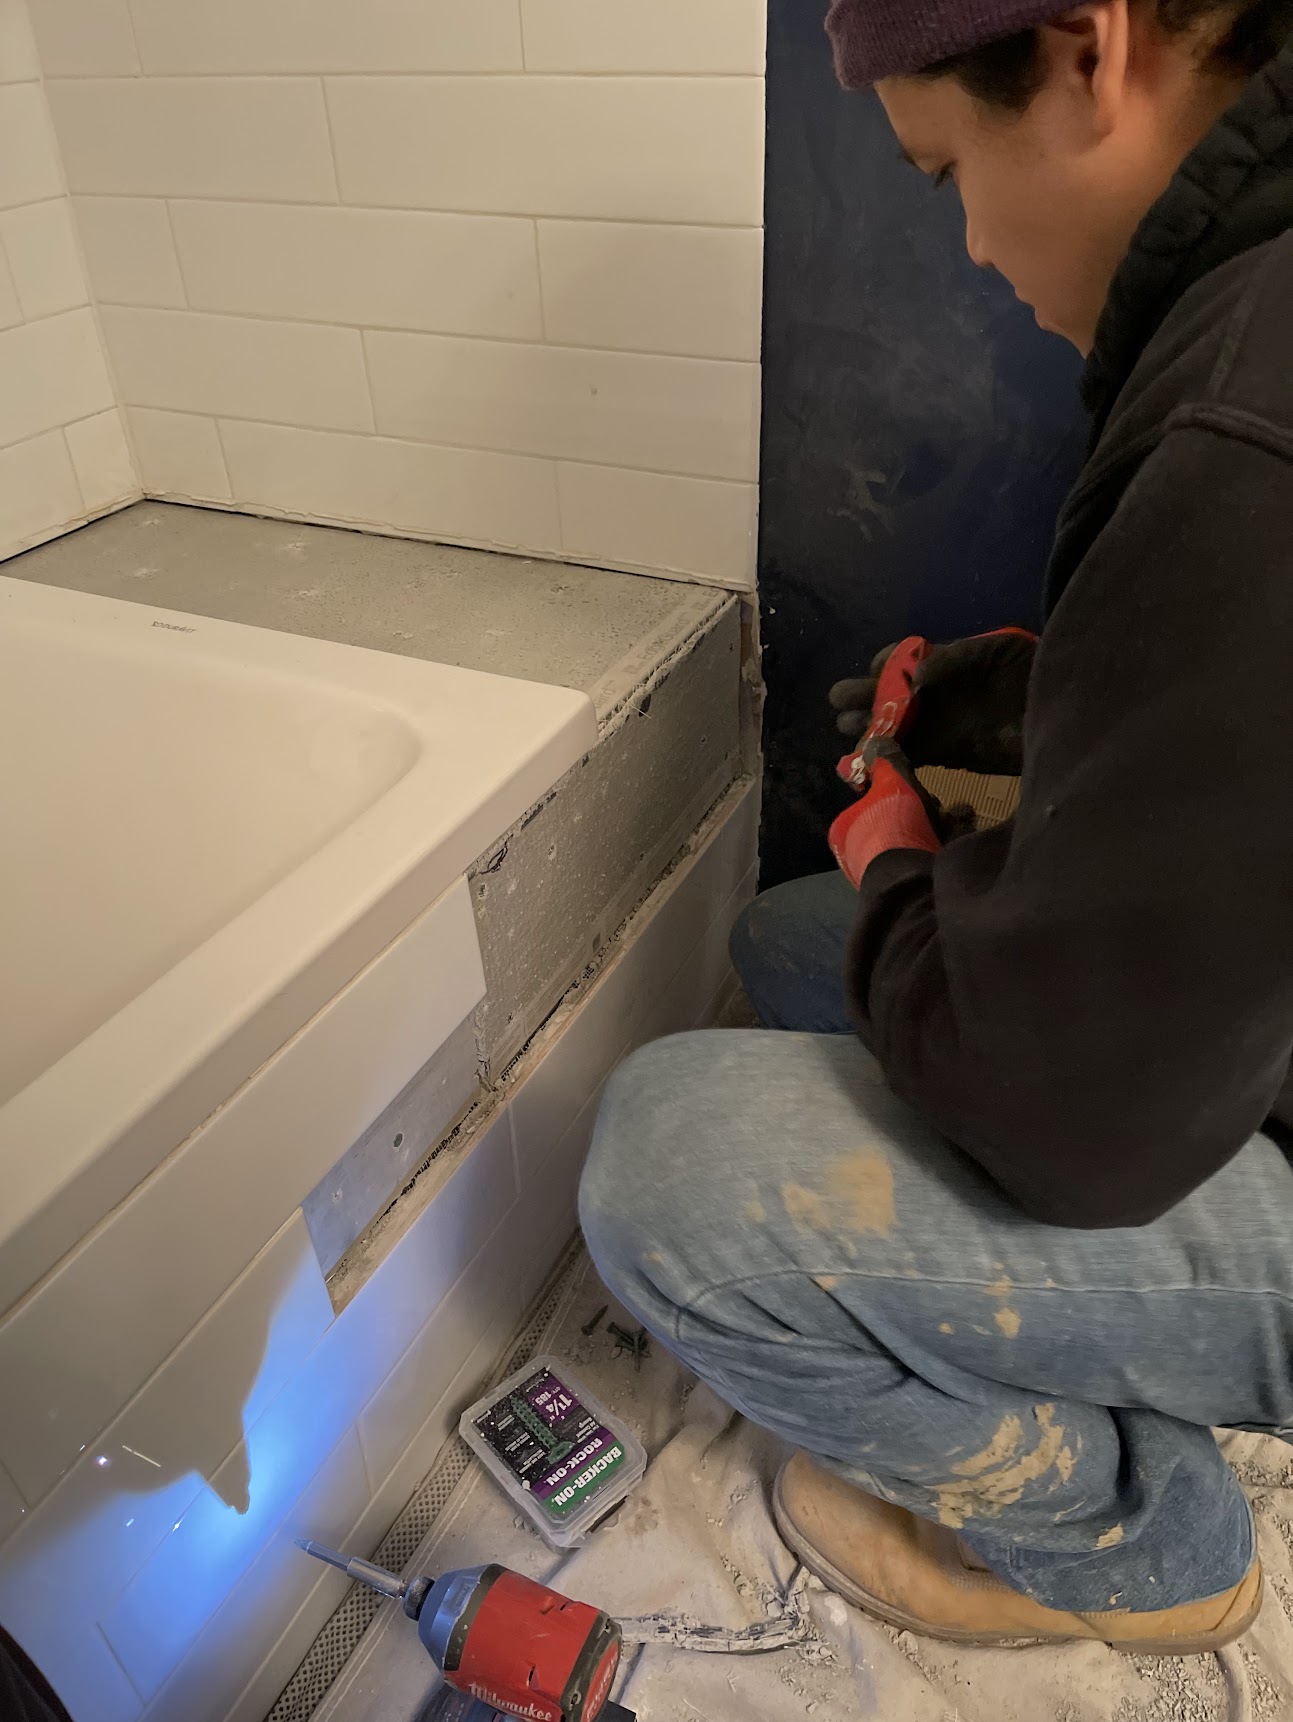
2 drywall installaters considering how many screws per sheet of drywall

Proper screw placement is just as important as the number of screws used. Screws should be spaced 16 inches apart on walls and 12 inches apart on ceilings. Edges need screws every 8 inches to keep things secure. Getting this right helps prevent sagging and cracking, making for a smoother finish that lasts longer.

Choosing the Right Fasteners

Screws are best for most drywall jobs. They hold better than nails and are easier to remove if needed.

Pick the right screw length:

  • 1 1/4 inch for 1/2 inch drywall
  • 1 5/8 inch for 5/8 inch drywall

Use coarse-thread screws for wood studs and fine-thread for metal. Make sure screw heads are slightly below the surface without breaking the paper.

For extra strength, some pros use glue with screws. This can cut down on the number of screws needed.

Detailed Drywall Screw Spacing Guidelines

Proper drywall screw spacing is key for strong, long-lasting drywall installation. The right spacing and number of screws keep walls and ceilings secure while avoiding issues like screw pops or sagging.

Two chicago handyman perform overhead ceiling drywall installation which requires more screws per sheet than wall installation

Drywall Screw Spacing Rules

On walls, space screws 16 inches apart in the field and 8 inches along edges.

For ceilings, use 12-inch spacing in the field and 7-8 inches on edges. Keep screws about 3/8 inch from panel edges to prevent crumbling.

Near doors and windows, add extra screws for added strength. Use a consistent pattern to make sure the drywall is well-supported all over.

The International Residential Code (IRC) sets these rules. They help stop problems like loose drywall or visible screw heads later on.

Calculating Screws Per Drywall Sheet

For a standard 4×8 foot sheet of 1/2-inch drywall, you’ll need about 32 screws. This follows the “4 screws per square yard” rule. Thicker 5/8-inch drywall needs more – around 40 screws per sheet.

Here’s a quick guide:

  • 4×8 foot sheet (1/2 inch): 32 screws
  • 4×8 foot sheet (5/8 inch): 40 screws
  • 4×12 foot sheet (1/2 inch): 48 screws

Adjust these numbers based on room features like windows or built-ins. It’s better to use a few extra screws than too few.

Avoiding Common Errors

Don’t overdrive screws. This can break the paper surface and weaken the hold. Set screw heads just below the surface.

Avoid “screw pops” by not putting screws too close to panel edges or joints. These can push through later and ruin the wall’s look.

Don’t skip screws to save time. This can lead to loose or wavy walls. Stick to the spacing rules for best results.

Use the right screw length. For 1/2-inch drywall, 1 1/4 inch screws work well. For 5/8-inch sheets, go with 1 5/8 inch screws.

Lastly, don’t rely on adhesives alone. While they help, screws are still needed for a secure install that meets building codes.