Top 5 Need To Know Tiling Tips

5wxw951f034fe71637

Getting ready to tile a bathroom shower? Maybe the kitchen floors need some revamping? Tiling is a fairly simple home project, but can seem daunting for novice home renovators. Well to ensure the project is done right the first time, here are 5 tips to absolutely follow:

1. Keep Those Tiles Dry- And Clean!


nqwky51f034ff466ae

Before beginning to place tiles in the desired pattern, make sure all the tiles are dry and clean. This will be a time and sanity saver throughout the course of the project.


2. Read The Directions On The Box!

everbuild_FWPOWGROUT1

Don’t be a fool- read the adhesive box directions. Just because The Property Brothers makes a kitchen tile install look simple doesn’t mean it is. View the box directions not as guidelines but as law.


3. On That Note- Wait The Full 24 Hours!

Mid_Tiling__jpg_465x600_q85

Any adhesive box will instruct to wait 24 hours until grouting the tiles of any home project. Not 12 hours, not 16 hours. Keep heartache out of the remodel, wait a whole day before finishing up the tiling project.


4. Use A Notched Trowel & Horizontal Patterns

PiBacksplash10

When applying adhesive and grout, there’s no need to get artistic or elaborate. Save that for craft time with the kids. Using a notched trowel, apply the material in horizontal lines, making sure to cover the tile entirely. No swirl shapes allowed!

5. Tiles Are Like Vampires, They Hate Sunlight

Cortico-Netos-ceramic-store-Lisbon-Portugal

For the love of all the DIY gods, do not store the tiles in direct sunlight before fixing them. A dry, clean room with no windows is preferred.


And for even more tiling rules, check out Joanna Johnson’s Golden Rules of Tiling.  

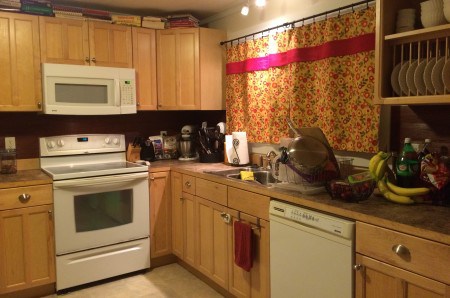
Half Kitchen Face Lift

bLwhw9H

Before remodel by nixonneckweasel

0FuE05A

After remodel by nixonneckweasel

Everyone wants to have a gorgeous, gourmet kitchen. Unfortunately, some people don't have the money or time to dedicate to a full makeover. Previously in Idea Corner, I posted some easy steps to upgrade an outdated bathroom. Now I'll show how to take a kitchen from a simple eatery to a grand entertaining space.

5ghfm5t

Removal of backsplash by nixonneckweasel

Reddit user, nixonneckweasel, improved their kitchen drastically with just a couple of projects. The required supplies are:

  •  A hammer
  • A pry bar
  • Putty knives in multiple sizes
  • Concrete
  • Scrapers
  • Backsplash tiles
  • Grout
  • Painter's tape
  • Paint/paint brushes

First, choose the paint color for the cabinets and tiles for the new backsplash. For a more modern look, follow nixonneckweasel's example and go for a black paint and smaller tiles in more muted colors.

3PIheeL

After paint and concrete application by nixonneckweasel

Next,  take out those dated backsplash tiles. Using a hammer, pry bar and putty knives, remove all the tiles above the countertops. Try as much as possible not to remove the mortar and concrete behind the tiles. But if that happens, don't freak out! Just make sure to level the surface with concrete after the removal process is complete.

Following the tile removal, start to paint the cabinets. Make sure to apply painter's tape around the cabinets so paint doesn't get on the walls or backsplash area.


Once the paint has dried, feel free to put up the backsplash tiles. Once the tiles are attached to the wall, use grout to secure and seal the backsplash.

And with just 2 projects, a modern kitchen is created for just under $150.

S6unlAP

Final product by nixonneckweasel


Looking for a more drastic makeover? Contact Chicago Handyman for affordable prices on full kitchen remodels

Control The World With A Swipe Of A Finger With Ring ZERO

Ever wish your finger had the magic power to control the world around you? Well thanks to the minds at Logbar, technology is closer than ever with Ring ZERO.

ring_function-e1430308135901

Ring ZERO, a cloud-based device, uses gestural technology to perform over 20 everyday actions. From Powerpoint to light fixtures, on and off, back and forth, anything is possible with this ring wrapped around your finger.

So breathe the mystical into your life and check out the power of Ring Zero!

Revamp Any Set Of Stairs With This Simple Wallpaper Project!

Stairway on a luxury house interior

Bored with walking up the stairs and seeing bland wood? Well, with this simple tutorial from Sunset, anyone can take a set of stairs and turn them into a piece of art.

First, gather these materials:

  • Wallpaper
  • Wallpaper paste
  • 2-inch sponge brush
  • Scissors
  • Craft knife

Start by carefully measuring each stair riser separately. Then cut the wallpaper exactly to size.

2773eda8d2401367fa911ba4945e8acf1

Apply wallpaper paste with a 2-inch sponge brush to adhere the wallpaper to the stair. Begin at the top right corner and continue across the top and down the sides, wiping off any excess paste with a damp sponge.

977ebb0b23f540b5e95ea0a9271c2b9a

Allow a few hours to dry and then, voila! Enjoy gorgeous new stairs all guests will be talking about.

932442adaaacb4f9ac84d0a78936e558

Capture Every Moment With The Panono Panoramic Ball Camera

413251-hands-on-panono-panoramic-ball-camera

Gone are the days of a simple point-and-shoot camera. Photographers and photo enthusiasts alike are looking for the next big thing in photography… and the Panono Panoramic Ball Camera might just be it.

This camera sphere has 36 3-megapixel image sensors. When thrown in the air, it takes a photo that not only has 108 megapixels but a spherical image you can explore at home on the web.

So throw out the standard camera and throw up the Panono Panoramic Ball Camera for the best pictures possible.