-
Kitchen Remodel in Chicago | Chicago Handyman
Considering a kitchen remodel in Chicago? Our recent project offers a glimpse into the elegance…
-
Furniture Restoration in Chicago | Chicago Handyman
Revitalizing a piece of furniture can breathe new life into any space. At Chicago Handyman,…
-
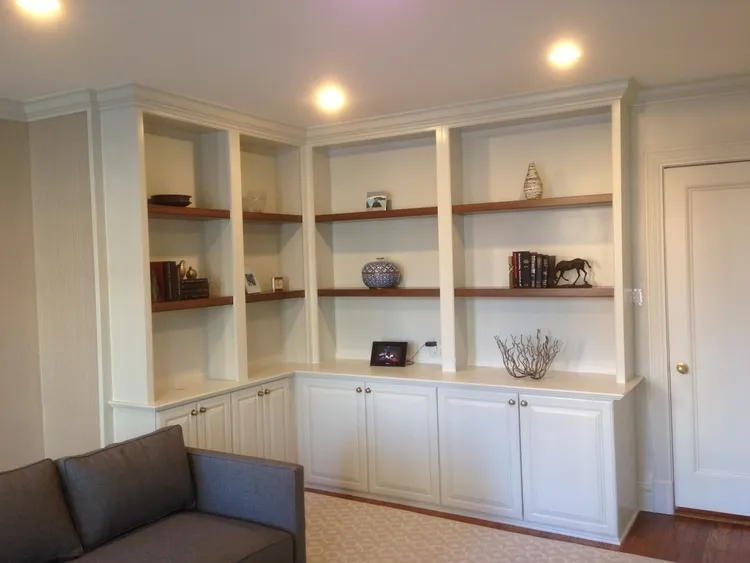
Bookcase Refinishing in Old Town Chicago | Chicago Handyman
Revamp your living space with a stunning bookcase refinishing that elevates both style and functionality.…
-
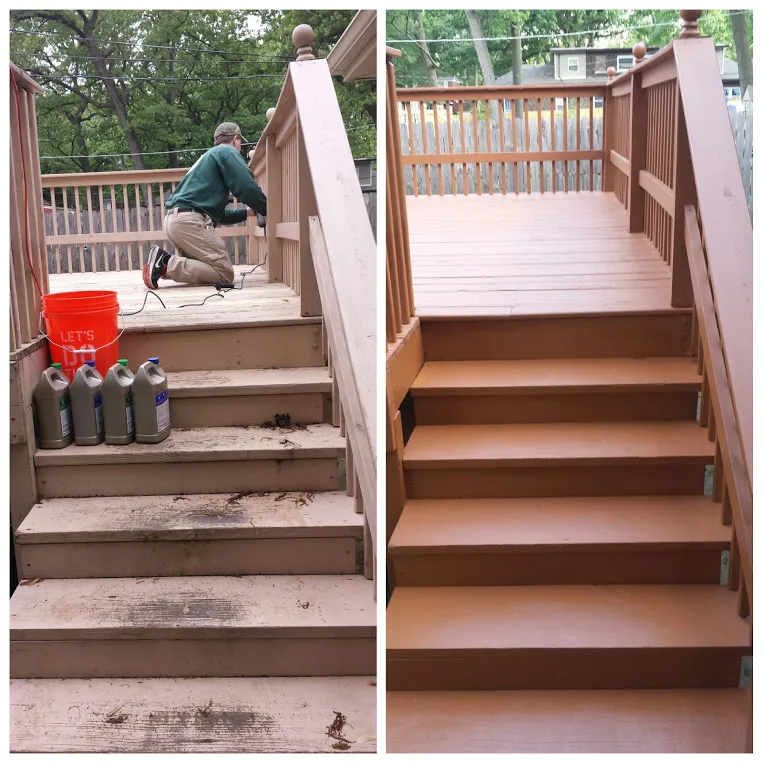
Deck Repair and Resealing in Lincoln Park | Chicago Handyman
As spring approaches in Lincoln Park, Chicago, homeowners are eager to enjoy their outdoor spaces.…
-

Venetian Plaster Fireplace in Wicker Park | Chicago Handyman
Elevate the style of your home with a stunning Venetian plaster fireplace. We recently completed…
1500 North Halsted Av Chicago, IL 60614
info@chicagohandyman.net
(773) 982 – 5500