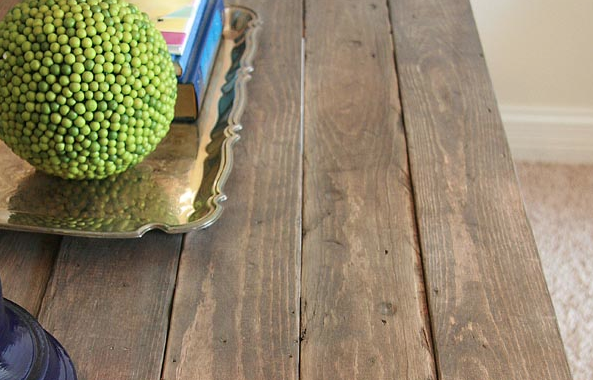
Make A New Material Look Old & Rustic Again!

Screen Shot 2015-05-11 at 11.59.47 PMSome people dig the modern look. Others love vintage victorian. However, plenty of homeowners seem to have some cowboy(girl) in them and want rustic materials on a budget. The great news is there’s no reason to break the bank to get that barnyard luxury aesthetic. Instead, follow these simple steps from Paper Daisy Design to turn any type of wood into the countryside materials that dreams are made of.

Here’s what’s needed:

  • 1″x4″ boards
  • Nails
  • Hammer
  • Crowbar
  • Knife
  • Sand paper
  • Dark stain

Screen Shot 2015-05-11 at 11.58.53 PM

Start with the easiest step: distressing the wood. This is where all those inner frustrations of the week can barrel out. Stab and claw at the 1″x4″ boards with nails, hammers, crowbars, anything that would leave a dent or mark. Beat it up until satisfied.

Screen Shot 2015-05-11 at 11.59.08 PM

Next, scrape off the straight edges. Make sure to sand the distressed boards lightly to give the material an old barnyard charm.

Screen Shot 2015-05-11 at 11.59.20 PM

Finally, add the desired stain. Ideally, this stain should be dark and will require multiple coats. Don’t hesitate to mix different hues, this makes the pieces look even more weathered. Perform a final sand job to ensure the rural style has been achieved.

And, voila!

…what to do with these new materials? Check out Idea Corner’s plethora of posts on recycling reclaimed wood into something beautiful! 

Who Said Recycling Is Boring? Upcycle Two Broken Chairs Into A French-Style Bench!

French-Styled Bench with pillows

Upcycling is becoming a trend among homeowners. Why? Because it’s a simple, affordable way to help the environment. So don’t trash broken chairs; turn them into a French-style Bench masterpiece!

Here’s the required supplies:

  • Two chairs
  • Sturdy hardwood
  • Pine wood
  • Long screws
  • Molding
  • Wood filler
  • Plywood
  • Paint
  • Quilt batting

Bench First step

Begin by choosing two chairs that look great from their sides, ( the curvier the better!) and then remove their front legs and seats.

Bench second step

Depending on the desired length of the bench, cut sturdy hardwood to length and nail together a rectangle box with two wood screws on each end. Make sure to attach the box by screwing through the chair and into the box to make sure it is extra secure.

Painting bench

To provide even more support, add a bottom bench. This will be a thinner rectangle box made of pine below the hardier bench box. Attach this to the bottom of the chair legs in the same manner as before. Following this addition, nail vertical slats of molding to the rectangle to create an area for storage.

Bench Top After

With construction complete, use wood filler to fill all the holes and then sand the material thoroughly. Once dry, paint the whole bench any color desired, though white is recommended.

Finally, add a 1/2″ plywood to the top of the bench and secure quilted batting and any material desired to finish off the backyard seating.

Enjoy the outdoors with a nearly new French-style bench!

For a step-by-step guide to how to build a French-style bench, check out Jami’s post from An Oregon Cottage!

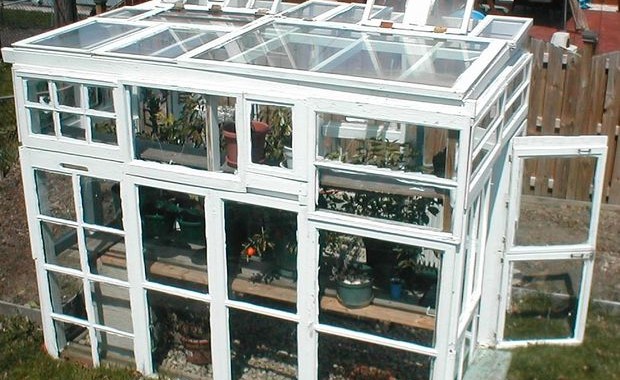
Add Green Style To A BackYard With A Window Frame Greenhouse

FQO5MM9FTVVI0HD.MEDIUM

A greenhouse can be a great addition to any blank canvas of a backyard. But there’s no need to spend a bunch of money on products. After all, the best way to be the most eco-friendly is to re-use and recycle materials. This window frame greenhouse does this in spades.

Here’s the materials required:

  • Old window frames
  • Lumber
  • Screws
  • Caulk
  • Latches

Once enough window frames have been gathered, create a frame for them to fit in. Use 2X4’s for the studs and 4X4’s for corner posts. There has to be at least 14″ of the stud to be placed in the ground for support.Place the walls up and brace them with lumber. Bury cinder blocks and then pour a concrete foundation over it to keep it stable. Then use screws to fix the windows to the frame.

F7IDAHNFTVVKR8X.MEDIUM

Cover this foundation with rocks and stones for drainage. For the roof, use siding for coverage, leaving at least 20-30 percent of open space for ventilation. Add some fans and shelves for easy access and displays.

FPYJ4FKFM2CTGRN.MEDIUM

F242WBBFM2CTGRY.MEDIUM

FONIB68FM2CTGSE.MEDIUM

Finally, it’s time to caulk and paint the outside of the frames. This will create consistency in the look.

FK6SI8BFTVVI0H4.LARGE

Once the paint dries, begin to hone plants and flowers. And revel in the fact that this space is all handmade.

For step-by-step tips, check out TreeHugger  for a full overview and other DIY greenhouse ideas.