Best floating vanities for 2025: Sleek storage solutions for modern bathrooms

Floating vanities are taking bathrooms by storm in 2025. These wall-mounted fixtures are both stylish and practical, giving bathrooms a modern look while freeing up floor space. They’re perfect for small bathrooms but work great in larger ones too.

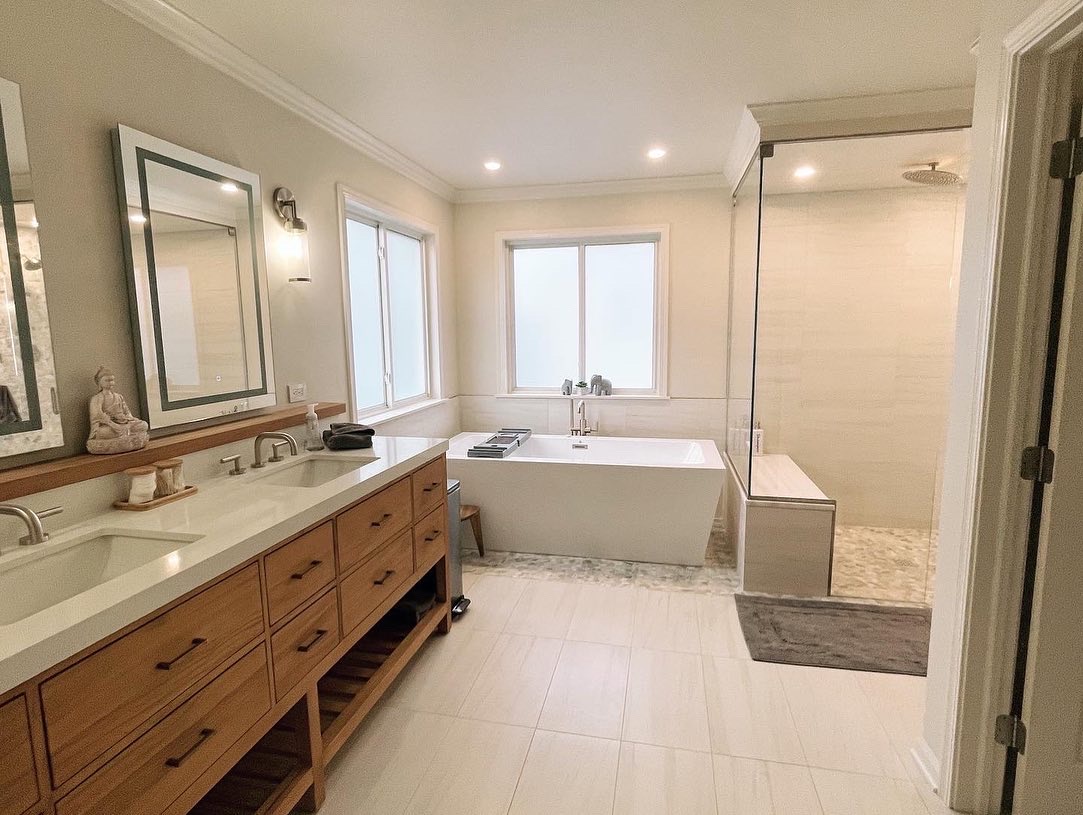
A sleek, minimalist bathroom with a floating vanity featuring clean lines and integrated LED lighting. The vanity is made of sustainable, eco-friendly materials and is surrounded by modern, geometric decor

The best floating vanities for 2025 combine sleek design with smart storage solutions. From compact single-sink models to spacious double vanities, there are options to suit every bathroom size and style. Many new designs also include high-tech features like built-in lighting or touchless faucets. With so many choices, it’s easier than ever to find a floating vanity that fits your needs and budget.

1) IKEA GODMORGON

The IKEA GODMORGON is a popular bathroom vanity that’s been a staple in many homes. It’s known for its sleek design and practical storage solutions.

This vanity comes in various sizes and finishes to suit different bathroom styles. The high-gloss white option gives a clean, modern look that brightens up any space.

One of the best features of the GODMORGON is its spacious drawers. They’re deep and provide plenty of room for toiletries and other bathroom essentials. IKEA even sells special organizers to keep everything tidy.

The GODMORGON is easy to install and comes with a 10-year limited warranty. This gives buyers peace of mind about their purchase.

However, it’s worth noting that the vanity is made of particle board. Some users have reported issues with water damage if not properly sealed or maintained.

For those who want a custom look, the GODMORGON can be hacked or modified. Some homeowners have added custom fronts or built frames around it for a unique touch.

2) Wyndham Collection Amare

The Wyndham Collection Amare offers sleek floating vanities for modern bathrooms. These vanities come in various sizes, including 48-inch and 72-inch options.

Customers can choose from different finishes like espresso and glossy white. The vanities feature brushed chrome trim and door pulls for a stylish look.

Top materials vary, with options including green tempered glass and white engineered stone. This allows buyers to match their bathroom decor.

The Amare line includes single and double sink vanities. Some models come with integrated sinks for a seamless appearance.

Many Amare vanities include matching mirrors. This creates a cohesive bathroom design without extra shopping.

The wall-mounted design saves floor space and makes cleaning easier. It’s great for both small and large bathrooms.

3) Fresca Valencia

Fresca Valencia is a top choice for floating vanities in 2025. These sleek wall-mounted units come in various sizes to fit different bathroom spaces.

The Valencia line offers modern elegance with its clean lines and minimalist design. Buyers can choose from finishes like glossy white, gray oak, and dark slate gray to match their bathroom decor.

These vanities are built using high-quality materials. The cabinets are made with moisture-resistant MDF, which helps them stand up to bathroom humidity.

One nice feature is the soft-closing door on many models. This prevents loud slamming and adds a touch of luxury.

Most Valencia vanities come with an acrylic-resin sink. This material is durable and easy to clean, making it great for daily use.

For those who need extra storage, some models include a matching medicine cabinet. This provides a handy spot for toiletries and medicines.

Fresca offers Valencia vanities in sizes ranging from 20 to 60 inches. This variety lets homeowners pick the perfect fit for their space.

4) Native Trails NativeStone

The Native Trails Topanga Series; the Topanga Floating Vanity specifically is a standout floating vanity for 2025. This sleek and stylish piece brings a touch of elegance to any bathroom.

Crafted from high-quality materials, the Halcyon offers durability and longevity. Its floating design creates a sense of spaciousness in the bathroom, making it perfect for smaller spaces.

The Topanga comes in various finishes to suit different tastes and decor styles. Its clean lines and minimalist aesthetic give it a modern look that’s sure to impress.

Storage is a key feature of this vanity. It provides ample space for toiletries and other bathroom essentials, keeping your space tidy and organized.

Native Trails is known for their commitment to sustainability. The Topanga is no exception, made with eco-friendly materials and processes.

Installation is straightforward, making it a great choice for both new builds and bathroom renovations. The floating design also makes cleaning underneath a breeze.

With its blend of style, functionality, and eco-consciousness, the Native Trails Topanga is a top pick for floating vanities in 2025.

5) James Martin Mercer Island

The James Martin Mercer Island vanity is a top pick for 2025. This stylish piece comes in various sizes, including a 72-inch model that’s perfect for larger bathrooms.

The Mercer Island vanity has a modern, floating design that gives bathrooms a sleek look. It’s available in different finishes, like glossy white and ash gray, to match any decor.

One cool feature is the bamboo in-drawer organizer. This helps keep bathroom essentials tidy and easy to find.

The vanity comes with plenty of storage space. It has drawers and cabinets to store toiletries, towels, and other bathroom items.

Customers can choose from different countertop options, including glossy white or dusk grey composite. These materials are durable and easy to clean.

For those who need a smaller size, there’s a 36-inch version that’s great for powder rooms or guest bathrooms. It has the same high-quality construction as its larger counterpart.

The Mercer Island vanity is a solid choice for anyone looking to upgrade their bathroom in 2025. Its combination of style, storage, and quality makes it stand out from the crowd.

6) KubeBath Bliss

KubeBath Bliss vanities are a top pick for 2025. These modern bathroom vanities come in various sizes and styles to fit different spaces.

The Bliss line offers single and double sink options. They have sleek designs that give bathrooms a fresh, updated look. Most models are wall-mounted, creating a floating effect that makes rooms feel bigger.

KubeBath uses quality materials in their Bliss vanities. They have wood veneer construction that’s water-resistant. The sinks are made of sturdy acrylic.

One standout feature is the soft-closing drawers. These use high-end European hardware for smooth operation. It’s a nice touch that adds to the luxurious feel.

Color choices include classic white and bold options like blue. This lets homeowners match their vanity to their bathroom’s style. The Bliss 60″ model is popular for larger bathrooms.

KubeBath Bliss vanities blend style and function. They offer ample storage space without taking up floor area. For those seeking a modern, floating vanity in 2025, the Bliss line is worth considering.

7) Virtu USA Midori

The Virtu USA Midori line offers sleek floating vanities for modern bathrooms. These vanities come in various sizes to fit different spaces.

The Midori vanities feature a grey oak finish that adds a touch of elegance to any bathroom. They have clean lines and a minimalist design that looks great in contemporary settings.

One popular option is the 24-inch single vanity. It’s perfect for smaller bathrooms or powder rooms. The vanity includes a white polymarble basin that’s easy to clean.

For larger bathrooms, Virtu USA offers a 54-inch double vanity in the Midori line. This model provides ample storage and counter space for two people.

The Midori vanities come with polished chrome hardware that complements the grey finish nicely. Some models also include matching mirrors to complete the look.

These floating vanities are a great choice for those who want a stylish and functional bathroom update in 2025. They combine practicality with modern design, making them a popular option for homeowners.

8) Ronbow Signature

Ronbow Signature offers a stylish line of floating vanities for the modern bathroom. These vanities combine sleek design with practical functionality.

The brand is known for its minimalist approach and clean lines. Ronbow Signature vanities often feature wide cabinets with linear designs that make a bold statement.

Many Ronbow Signature models come with unique white ceramic sink tops. These sinks have a flared edge, adding an elegant touch to the overall look.

Storage is a key feature of these vanities. They provide ample space for bathroom essentials while keeping the area tidy and organized.

Ronbow Signature vanities are made with high-quality materials. This ensures they can withstand daily use in busy bathrooms.

These floating vanities create an open, airy feel in the bathroom. They make the space appear larger, which is great for smaller bathrooms.

Ronbow Signature offers various sizes and finishes. This allows homeowners to find the perfect fit for their bathroom style and size.

Design Trends for Floating Vanities

Floating vanities are becoming more popular in modern bathrooms. They combine style and function in sleek, space-saving designs. New trends focus on clean lines and eco-friendly materials.

Minimalist Aesthetics

Floating vanities are embracing simple, clean designs. Smooth surfaces and hidden hardware create a tidy look. Many have slim profiles to make bathrooms feel bigger.

Colors are shifting to neutral tones like white, gray, and light wood. These shades help rooms feel calm and spa-like. Some vanities mix materials for visual interest. Wood and metal combos are trendy.

Storage is smart and subtle. Pull-out drawers and hidden compartments keep clutter out of sight. LED lighting under vanities adds a soft glow and makes them appear to float.

Sustainable Materials

Eco-friendly materials are a big trend for floating vanities. Bamboo and reclaimed wood are popular choices. These materials look good and help the planet.

Recycled materials are showing up in vanity tops. Crushed glass and recycled plastic create unique, durable surfaces. Some companies use ocean plastics to make vanity parts.

Water-resistant treatments protect natural materials. This makes wood vanities more practical for bathrooms. Low-VOC finishes and glues are healthier for homes.

Vanities with built-in water-saving features are gaining fans. Some have special faucets or low-flow systems to cut water use.

Installation Tips and Tricks

Putting up a floating vanity takes some know-how. It’s key to get the wall-mounting right and think about the plumbing setup. Here are some handy tips to make your install go smoothly.

Wall-Mounting Techniques

Start by finding the wall studs. Use a stud finder to locate them. Mark their spots clearly. Next, put up a level ledger board to support the vanity’s weight. This board is super important.

Attach the mounting bracket to the wall studs. Make sure it’s straight with a level. Drill pilot holes first, then screw it in tight.

Get a friend to help lift the vanity onto the bracket. It can be heavy! Double-check that it’s level once it’s up. If not, adjust as needed.

Plumbing Considerations

Think about your pipes before you start. You might need to move some things around.

Cut holes in the back of the vanity for pipes. Measure twice, cut once! Make the holes a bit bigger than the pipes for wiggle room.

Connect the sink to the drain tube after the vanity is up. Hook up the hot and cold water lines too. Check for leaks by running the water.

Don’t forget about the P-trap. It needs to fit inside the vanity. You might need to adjust its position.

Test everything once it’s hooked up. Fix any leaks right away. A little extra time here can save big headaches later.

Why Flooring Repair Shouldn’t Be Ignored: Don’t Let Your Home Fall Apart

Flooring problems can sneak up on homeowners, but they shouldn’t be ignored. What starts as a small issue can quickly grow into a big headache. Uneven or loose tiles might seem like no big deal, but they can lead to trips and falls. This is extra risky for kids and older folks.

Fixing floor issues early can save a lot of money and trouble down the road. When floors are left in bad shape, they can cause bigger problems. Water might seep in and cause damage or mold. The home’s structure could even be at risk if foundation issues are behind the flooring problems.

Regular checks and fixes for flooring keep homes safe and looking good. It’s smart to deal with small problems before they turn into big ones. Taking care of floors is part of keeping a home in top shape for years to come.

Understanding the Importance of Flooring

Flooring plays a vital role in homes. It affects how a house looks and feels. It also helps keep the building strong and stable.

The Role of Flooring in Home Aesthetics

Floors make a big impact on a room’s look. They set the tone for the whole space. Different types of flooring can change how a room feels.

Wood floors can make a room feel warm and cozy. Tile might give a clean, modern vibe. Carpet can add softness and comfort.

The color of flooring matters too. Light floors can make a room feel bigger. Dark floors can add drama. Patterns can make a space more interesting.

Flooring ties a room together. It helps other design elements like furniture and wall color work well together.

Flooring as a Key Structural Component

Floors do more than just look good. They help keep a building strong.

Floors support the weight of people, furniture, and everything else in a home. They need to be sturdy to do this job well.

Good flooring helps spread out weight evenly. This keeps the building stable. It also helps prevent damage to walls and ceilings.

Floors can even help with insulation. They can keep heat in during winter and out during summer. This can save energy and money.

Some types of flooring, like concrete, can make a building stronger overall. They add to its structure and stability.

Recognizing and Addressing Common Issues

A cracked and warped wooden floor with water damage spreading from a leaking pipe underneath

Flooring problems can sneak up on homeowners. Catching issues early and taking action can save time and money. Let’s look at how to spot damage, prevent problems, and fix common flooring issues.

Spotting Signs of Flooring Damage

Keep an eye out for these red flags:

  • Scratches and dents
  • Squeaky or creaky boards
  • Gaps between planks
  • Fading or discoloration
  • Soft or spongy areas
  • Cracks in tiles

Check your floors often. Run your hand over the surface to feel for rough spots. Listen for strange noises when you walk. Look for changes in color or shine. These signs can point to bigger problems if left alone.

Proactive Steps to Prevent Damage

An ounce of prevention is worth a pound of cure. Try these tips:

  • Use felt pads under furniture legs
  • Place rugs in high-traffic areas
  • Clean spills right away
  • Sweep or vacuum regularly
  • Trim pet nails
  • Use proper cleaning products

Effective Strategies for Repair

When damage happens, act fast. Here are some DIY fixes:

  • Fill small scratches with wood filler
  • Tighten loose boards with screws
  • Use wood putty for deeper gouges
  • Replace badly damaged planks

For bigger jobs, call a pro. They can sand and refinish hardwood or replace cracked tiles. Quick action can stop small issues from getting worse.

Remember, regular care is key. By staying on top of floor maintenance, you can avoid costly repairs down the road.

Couch Cleaning Service Chicago: Get Your Sofa Spotless in a Snap

Is your couch looking a bit worse for wear? A professional couch cleaning service from Chicago Handyman can bring it back to life. Prices for couch cleaning typically range from $420 to $950, depending on the size and fabric type. We can provide an estimate with just a few photos.

Our services include steam cleaning to remove tough stains and odors.

We rely on eco-friendly products that are safe for your family and pets.

Getting your couch professionally cleaned can make your whole living room feel fresher. It’s an easy way to spruce up your space without buying new furniture. Plus, regular cleaning helps couches last longer by removing dirt that can wear down the fabric over time.

Couch Cleaning Services in Chicago

Chicago Handyman offers many options for professional couch cleaning. Our services refresh and restore furniture, making it look and smell like new again.

Why Professional Upholstery Cleaning Matters

Couches see a lot of use in most homes. They collect dirt, dust, and stains over time. Professional cleaning helps remove these buildup and extends the life of furniture.

Our experts use special tools and products to clean deeply. We can tackle tough stains that regular cleaning misses. This deep clean also gets rid of allergens and bacteria hiding in the fabric.

A clean couch makes the whole room look better. It can brighten up a space and make it more inviting.

Revitalizing Your Furniture

Our Furniture cleaning goes beyond couches.

Think of us when its time to clean chairs, ottomans, and even mattresses.

We have methods to clean all different fabric types, from cotton to leather.

Our pros can remove stains, odors, and allergens from your furniture. In some cases dry cleaning is used for delicate fabrics or steam cleaning for tougher jobs.

Regular furniture cleaning can make your pieces look newer and last longer. It’s especially helpful for homes with pets or kids.

Gate Repair: Why Your Fence is Laughing at You

Ah, the wonderful world of gate repair – where dreams of smooth openings and closings come true! Picture this: you’re driving up to your home after a long day, ready to relax. But wait! Your electric gate decides it’s had enough and refuses to budge. Talk about a party pooper!

Our Gate repair services can fix a wide range of issues, from faulty motors to damaged hinges and everything in between.

We’ve seen it all – gates that creak louder than your grandpa’s knees, and even those stubborn ones that just won’t play nice with your remote control.

But fear not, dear homeowners and business owners! With a little TLC from the gate repair pros, your trusty portal will be back to its gate-tastic self in no time. Who knows, it might even start greeting you with a cheerful “ding” instead of that grumpy old groan. So next time your gate decides to go on strike, remember: there’s always a solution, and it usually involves a wrench and a good sense of humor!

The Ins and Outs of Gate Repair

Gates can be real drama queens sometimes. They squeak, they stick, and they refuse to budge when you’re running late. Let’s peek behind the curtain of gate repair and learn how to tame these temperamental beasts.

Diagnosing Your Gate’s Moody Behavior

Is your gate throwing a tantrum? Look for these telltale signs:

  • Slow-motion opening and closing (like it’s auditioning for a dramatic movie scene)
  • Weird noises that sound like a rusty robot trying to sing
  • Refusing to open or close fully (it’s giving you the cold shoulder)

Electric gates might beep at you like an annoyed R2-D2. This could mean the battery’s having a meltdown. Driveway gates sometimes go off-track, literally. They’re just trying to rebel against their constraints.

Tools of the Trade: Gate Repair Essentials

Every gate whisperer needs their magic wands:

  • Lubricant (to soothe those creaky joints)
  • Wrench set (for when you need to show the gate who’s boss)
  • Multimeter (to decode the secret language of electric gates)
  • Safety goggles (because nobody looks cool with a spring in their eye)

Don’t forget the most important tool: patience. Gates can sense fear, so stay calm and channel your inner gate guru.

Noisy Neighbors: Silence Squeaking Gates

Is your gate auditioning for a horror movie soundtrack? Time for some hush-hush tactics:

  1. Clean the hinges (they might be hiding a dust bunny convention)
  2. Apply lubricant generously (think of it as gate moisturizer)
  3. Tighten loose bolts (give ’em a good talking-to with your wrench)

For electric gates, check the motor. It might be crying out for attention. If all else fails, call in the pros. They’re like gate therapists, solving deep-rooted issues with expert care.

Regular gate maintenance is like taking your gate to the spa. A little TLC goes a long way in preventing diva-like meltdowns and keeping your gate in a good mood.

Gate Aesthetics: Boosting Your Curb Appeal

A charming wrought iron gate with decorative scrollwork and a fresh coat of paint stands against a backdrop of colorful flowers and manicured landscaping

Gates aren’t just for keeping the neighbors’ nosy dogs out. They’re like the fancy bow tie on your property’s tuxedo, making everyone go “Oooh” and “Aaah” as they pass by.

Choosing the Right Gate: Fashion vs Function

Picking a gate is like choosing an outfit for a blind date – you want to impress, but also be practical. Iron gates strut their stuff with strength and style, perfect for those who want to feel like medieval royalty. Wooden gates, on the other hand, give off that warm, rustic vibe, ideal for homes that want to whisper “come on in” rather than shout “keep out!”

Commercial gates mean business, literally. They’re the bouncers of the gate world, keeping unwanted visitors at bay while still looking sharp in a suit.

Wooden Gate Wonders and Iron Gate Elegance

Wooden gates are the lumberjacks of the fence world – rugged, charming, and surprisingly versatile. They can be carved, painted, or left au naturel, depending on how much of a tree-hugger you are.

Iron gates, however, are the supermodels of the gate catwalk. With their intricate designs and exceptional craftsmanship, they’re always ready for their close-up. Gate welding is like plastic surgery for these beauties, keeping them looking young and fabulous.

Skilled professionals can turn a plain gate into a work of art faster than you can say “open sesame.”

The Art of Gate Automation

Welcome to the 21st century, where gates open themselves like magic! Gate operators are the lazy person’s best friend, letting you enter your property without leaving the comfort of your car.

Swing gates dance open with the grace of a ballet performer, while sliding gates glide like they’re on ice skates. Automation isn’t just for show, though – it’s also great for those days when you’re too tired to get out and push.

Just remember, a gate with a mind of its own can be hilarious… until it decides to close while you’re halfway through!

How to Wet Sand Drywall: Quick Tips for a Smooth Finish

Fixing up walls doesn’t have to be a dusty mess. Wet sanding drywall is a smart way to get smooth walls without the clouds of dust. This method uses water and a sponge to smooth out drywall mud, creating a clean finish for painting or wallpapering.

Most joint compound instructions state that wet sanding is an option. People dont read instructions like they used to, but there’s a lot of information from the drywall manufacturers right on the bag.

Wet sanding is great for small touch-ups or whole room renovations. It’s easier on your lungs and keeps your workspace cleaner. Plus, it’s simple enough for beginners but effective for pros too.

To wet sand, you’ll need a bucket of warm water and a special drywall sponge. The process involves gently rubbing the dried joint compound with the damp sponge. This softens and smooths the surface, getting rid of bumps and marks. It takes a bit more time than dry sanding, but the trade-off is less cleanup and a healthier work environment.

Preparing to Wet Sand Drywall

Wet sanding drywall takes some prep work. You’ll need to get the right tools and take safety steps before starting.

Gathering Materials

Get a sanding sponge made for drywall. It has a rough side and a smooth side. You’ll also need a bucket and warm water. Fill the bucket about halfway.

Some folks like to have sandpaper on hand too. It can help with stubborn spots. Grab a drywall sponge if you want extra smoothing power.

Make sure you have enough joint compound or drywall mud. You might need to patch spots as you go.

Safety Measures

Put on a dust mask. Even with wet sanding, some dust can still fly around. Safety glasses are a must too. They keep gunk out of your eyes.

Wear old clothes. Wet sanding can get messy. You don’t want to ruin your good stuff.

Open windows if you can. Fresh air helps clear out any dust or smell from the drywall mud.

Keep a towel nearby. You’ll want to wipe your hands now and then. It also helps catch drips before they hit the floor.

Executing the Wet Sanding Process

Wet sanding drywall creates a smooth finish without the mess of dry sanding. The process needs care and the right tools. Let’s look at how to do it step by step.

Wet Sanding Techniques

Start by getting a drywall sponge damp. Squeeze out extra water so it’s not dripping. Use the sponge’s soft side for most areas. Move it in circles or figure-eights over the surface. Don’t push too hard.

For tough spots, flip to the rougher side. Be gentle to avoid damage. Work on small sections at a time. Rinse the sponge often to keep it clean.

In tight corners, fold the sponge to fit. This helps smooth out hard-to-reach places.

Smoothing and Finishing

After the first pass, check for bumps or dips. Use light touches to even out these spots. Pay extra care to joints where drywall meets.

A tack cloth can wipe away loose bits. This shows any areas that need more work. Keep at it until the wall feels smooth all over.

For a super fine finish, try a second pass with a fresh, barely damp sponge. This can catch tiny flaws you might have missed.

Cleanup and Post-Sanding

Wet sanding makes less mess, but there’s still cleanup. Use a shop vac to suck up any fallen bits of mud. Then, wipe down the walls with a clean, damp cloth.

Let the area dry fully. This might take a few hours. Once dry, run your hand over the surface. If you feel any rough spots, give them a quick touch-up.

Clean your tools right away. Rinse sponges well and let them dry. This keeps them ready for next time. A clean workspace makes for easier painting later.