A Mosaic Table To Accent Any Room

mhh7hpw

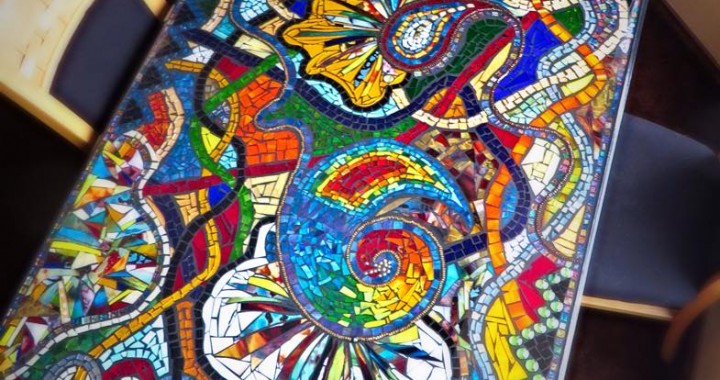
Final product by am_i_man_or_muppet

OfC890w

Adding the molding by am_i_man_or_muppet

Some tables are supposed to be basic surfaces to eat on. A mosaic table is not one of them. While a mosaic table can be eaten on, it will also add an artistic flair to any room in a home. Don’t worry about being an expert craftsperson either. With a simple surface, moulding, wood glue, a brad nailer, glass scraps, epoxy resin and grout, a mosaic table can be made by even the most amateur home improvers.

First, attach the molding to the corners of the table. This creates a border for the mosaic to be placed in. All the molding should be cut at a 45 degree angle beforehand. Then using a brad nailer and wood glue, secure the molding to each side of the table.

EqIfRg2

In process design by am_i_man_or_muppet

Depending on how fluid or particular the design, there may be a period of sketching on the table surface. Reddit user, am_i_man_or_muppet, preferred to lay glass and beading as they went, allowing the end project to surprise them. Glue down the glass and bead pieces with any type of glue on hand. Arranging the glass and beading is the longest part of the process but also the most enjoyable.

CiwO5tu

The grout-y mess by am_i_man_or_muppet

When all the pieces are glued down, it is time for the grouting to begin. This will be a messy, grout-y process but totally worth it. The grout should be all over the glass by the end of the application. To keep the grout moist, spray it with water while you squeegee it off. Once all the grout is removed, pour a layer of epoxy resin to seal in the pieces of glass and beading.

All that’s left to do is find a place for this piece of art-slash-furniture. Enjoy!

Make This Winter A Little Easier with Dark Sky

Well, it’s official. Chicago winter is here. And the cruel prankster that it is, it waited until after January 1st to give us any snow. However, Dark Sky may have just made your life- or at least your daily commute a little easier.

weather

Dark Sky is a crazy accurate weather app that gives you exact details about the weather you’re about to step into. Available for iPhone and iPad, this weather app brings you local and global weather in an accessible yet beautiful display. Not only that, but it puts the weather in the simple terms you’re looking for.

Want to know exactly how many minutes until it starts snowing? Done.

Need a detailed breakdown of the upcoming weekend forecast for your mini vacation? Coming up with just a few taps on your screen.

Not looking to get a blow dry courtesy of the wind? Simply access the wind direction and speed in your area.

widget-precip

While Dark Sky may cost $3.99, it is definitely worth it. Skip one Starbucks run in favor of saving yourself

Frugal Friday: A $10 Kitchen Remodel!

IMG_1222-e1423013988298-450x298

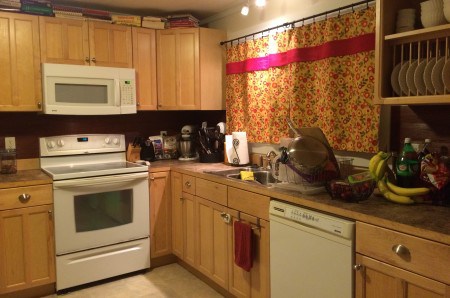
In the past, Idea Corner has shown you a Half-Bathroom Facelift and Half-Kitchen Facelift, but what about a $10 kitchen remodel? It’s now possible, thanks to Jennifer Collins!

This project will take no more than a day and add elegance on a bargain budget.

IMG_1204-450x450Here’s a low down on the supplies:

  • Peel & Stick Vinyl Flooring
  • Utility Knife
  • Ruler

Start by prepping the kitchen counters and backsplash area. Clean all surfaces and make sure to remove all outlet covers.

Begin peeling and sticking the vinyl flooring to the backsplash area. Depending on the look desired, cut down the slabs for shorter planks or leave them at the pre-cut length.

IMG_1208-e1423013244665-450x450

If left at the pre-cut length, there will still be some cutting with the utility knife involved. Measure the length and width of all outlet covers and moldings. Using these measurements, cut out the areas so outlets and moldings are accessible.

This vinyl backsplash will not only look expensive, but is easy to clean, waterproof and can be painted at any time to change the color.

So follow these easy steps and soon a basic kitchen will have a whole new life.

IMG_1207-e1423013662209-450x450

Want a more dramatic kitchen remodel? Give Chicago Handyman a call today for an affordable kitchen upgrade! 

The Modern Security Solution: Scout Wi-Fi Alarm System

IMG_0133-M-600x420

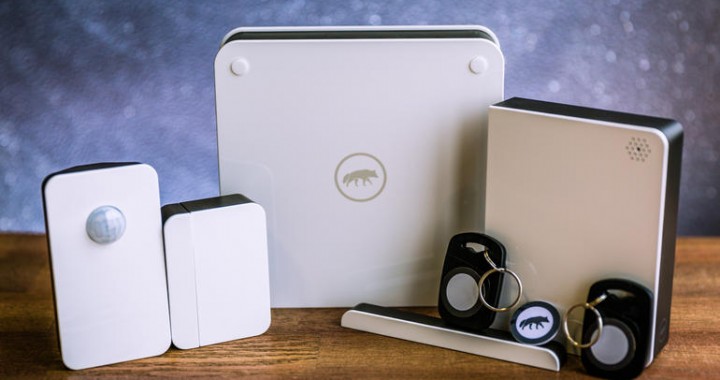
It used to be that home security was the luxury of homeowners. Renters remained susceptible to robbery and unable to check in on their home regularly. With the invention of Scout, this no longer has to be the case.

Scout is a revolutionary home security system. Not only does it lose the monthly contracts but the difficult installation. The system uses Wi-Fi to allow users to monitor their home, arm their alarms and even temporary grant access through a mobile app or website. It comes in many customizable finishes that can fit the decor of any home or apartment.

Best of all? When a person moves, the system comes along with them. No complicated process, pack it up with the rest of the items and install it as easily as the first time.

Scout only costs $120 for the system with no monthly fee unless you pay for professional monitoring. This one-time purchase will bring both home and financial security.

So why wait any longer? Get your home protected with just a few taps of a button. No phone calls necessary.


$15 For A Large Scale Dry Erase Board


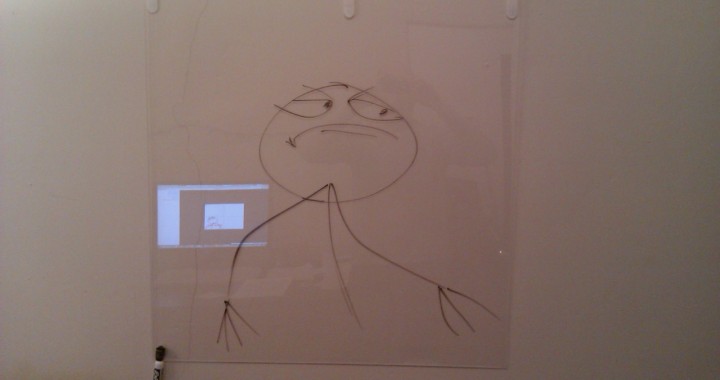
Whether there’s a burgeoning artist in a home or a person who really cannot remember to pick up toilet paper, a dry erase board can be a great asset to any home. However, large scale dry erase boards can be expensive at office supply stores and small sized ones are easily ignored. Reddit user tf2ftw found a great solution! With some simple supplies, a unique, large dry erase board can be achieved.

Pick up the following materials:

  • Plexiglass
  • 3 3M picture hanging strips
  • String
  • Tape
  • Dry erase markers

Installation is easy. Start by attaching the plexiglass to the 3 3M picture hanging strips on the desired wall. Do not remove the protective plexi glass covering until the board is placed perfectly.

Following the plexiglass being put in place, tape the string to the top of the plexiglass. The other end of the string should be taped to the cap of the dry erase marker. This will give easy access to the marker when using the board.

And that’s it. A simple project to add some efficiency to even the most chaotic home affairs. Swap out the marker easily once the ink starts to dry out. Considering it’s a Friday, this may be something to try tonight. Saturday morning groceries don’t buy themselves.