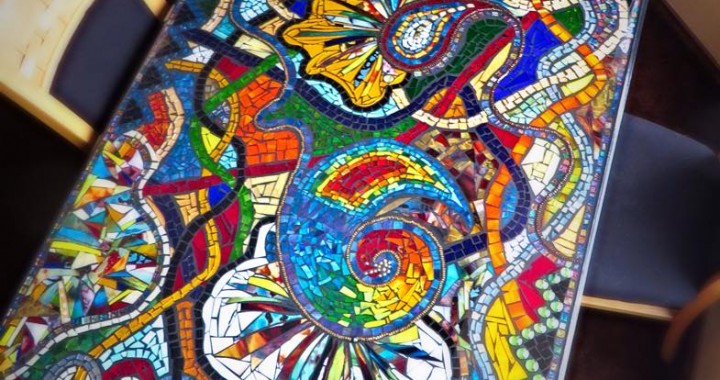


Some tables are supposed to be basic surfaces to eat on. A mosaic table is not one of them. While a mosaic table can be eaten on, it will also add an artistic flair to any room in a home. Don’t worry about being an expert craftsperson either. With a simple surface, moulding, wood glue, a brad nailer, glass scraps, epoxy resin and grout, a mosaic table can be made by even the most amateur home improvers.
First, attach the molding to the corners of the table. This creates a border for the mosaic to be placed in. All the molding should be cut at a 45 degree angle beforehand. Then using a brad nailer and wood glue, secure the molding to each side of the table.

Depending on how fluid or particular the design, there may be a period of sketching on the table surface. Reddit user, am_i_man_or_muppet, preferred to lay glass and beading as they went, allowing the end project to surprise them. Glue down the glass and bead pieces with any type of glue on hand. Arranging the glass and beading is the longest part of the process but also the most enjoyable.

When all the pieces are glued down, it is time for the grouting to begin. This will be a messy, grout-y process but totally worth it. The grout should be all over the glass by the end of the application. To keep the grout moist, spray it with water while you squeegee it off. Once all the grout is removed, pour a layer of epoxy resin to seal in the pieces of glass and beading.
All that’s left to do is find a place for this piece of art-slash-furniture. Enjoy!