Smart Technology Meets Old-Fashioned Biking

Chicago’s becoming a biking city. Whether you’re a casual bike rider, a daily bike commuter or bike exerciser, the Hammerhead bike navigation unit adds sophistication and smart technology to your bike riding experience. With a simple Bluetooth connection, the Hammerhead will get you to your destination quickly and safely.

After attaching the Hammerhead to your handlebars and downloading the app, you will immediately streamline your biking experience. The LED lights point you in the right direction without distracting you from the road. Meanwhile, Bluetooth navigation will guide you away from any traffic and get you where you need to go faster.

With new shipments available in February, you’re going to want to get in on this $85 deal. Check out the video below for a closer look at this innovative product.

Top 5 Need To Know Tiling Tips

5wxw951f034fe71637

Getting ready to tile a bathroom shower? Maybe the kitchen floors need some revamping? Tiling is a fairly simple home project, but can seem daunting for novice home renovators. Well to ensure the project is done right the first time, here are 5 tips to absolutely follow:

1. Keep Those Tiles Dry- And Clean!


nqwky51f034ff466ae

Before beginning to place tiles in the desired pattern, make sure all the tiles are dry and clean. This will be a time and sanity saver throughout the course of the project.


2. Read The Directions On The Box!

everbuild_FWPOWGROUT1

Don’t be a fool- read the adhesive box directions. Just because The Property Brothers makes a kitchen tile install look simple doesn’t mean it is. View the box directions not as guidelines but as law.


3. On That Note- Wait The Full 24 Hours!

Mid_Tiling__jpg_465x600_q85

Any adhesive box will instruct to wait 24 hours until grouting the tiles of any home project. Not 12 hours, not 16 hours. Keep heartache out of the remodel, wait a whole day before finishing up the tiling project.


4. Use A Notched Trowel & Horizontal Patterns

PiBacksplash10

When applying adhesive and grout, there’s no need to get artistic or elaborate. Save that for craft time with the kids. Using a notched trowel, apply the material in horizontal lines, making sure to cover the tile entirely. No swirl shapes allowed!

5. Tiles Are Like Vampires, They Hate Sunlight

Cortico-Netos-ceramic-store-Lisbon-Portugal

For the love of all the DIY gods, do not store the tiles in direct sunlight before fixing them. A dry, clean room with no windows is preferred.


And for even more tiling rules, check out Joanna Johnson’s Golden Rules of Tiling.  

Civil and Social Makes use of of Drones

Civil and Social Makes use of of Drones

Drones refer to unmanned aircrafts that aid in different treatments, ranging from societal to civic callings. They satisfy the expectations of masses as a result of their innovative structures that ensure effectiveness on the supply of assistance and things.cheap custom essay writing Drones ended up at the start looked at as war helps. Nonetheless, the progress of mini drones that fit many social requires have advertised their use using a large. Drones adapt to solutions which may monitor, observe, and give suggestions about the viability of an specified project. They will also help a society to optimize assets, manage undertakings as well as prevent the occurrence of calamities. […]

The Best Eco-Friendly Flooring: Cork

Hardwood floors are a staple in most home renovations nowadays. But this flooring can often be harmful to nature. However, there is an attractive, easily installed alternative that not only does not hurt the tree but adds interest to an otherwise traditional home. This material is cork flooring.

Though not ideal for bathrooms, this flooring can function in every other room of the home. And it can be easily installed over tile, concrete or most other original flooring in the home.

cork-floor-2

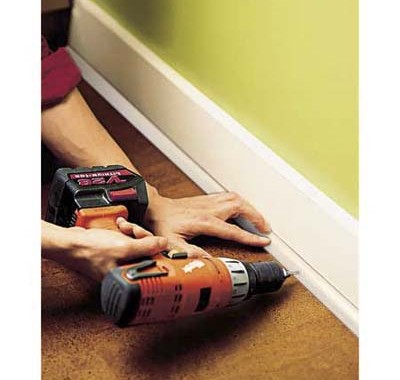
Begin installing cork flooring by placing a cork plank on top of the threshold and cut away trim from the doorstops on either side of the door above the threshold. Remove any cabinet toe kicks and edges of  wall casings.

cork-floor-5

Then lay cork planks along the longest uninterrupted wall, leaving 1-inch for expansion. Start laying the planks and gently press down until the tongue and groove of the planks click together. Do this until the first course is laid. Place 1/2″ spacers on the floor and start to slide them in. Following filling the space, begin to mallet the planks into place.

cork-floor-7

Finally reinstall any trim, toe-kicks or doorstops that were initially removed in the cork flooring process.

cork-floor-1

No finishing required and a whole new room for even more eco-friendly home solutions!

For a complete walk-through, check out This Old House.

And for even more flooring solutions, contact Chicago Handyman today!