Bathroom Tile Installation

It was a sunny afternoon in October. I get a call for a standard bathroom tile caulk job around the tub. I get on site and can see it is going to need more than just caulk. I propose replacing the tile around the bottom of the tub. The owner agrees and I get right to it.

Chicago bathroom tile remodel

Chicago Bathroom with plaster walls. There was no seal between the walls and tub causing water to destroy the wall.

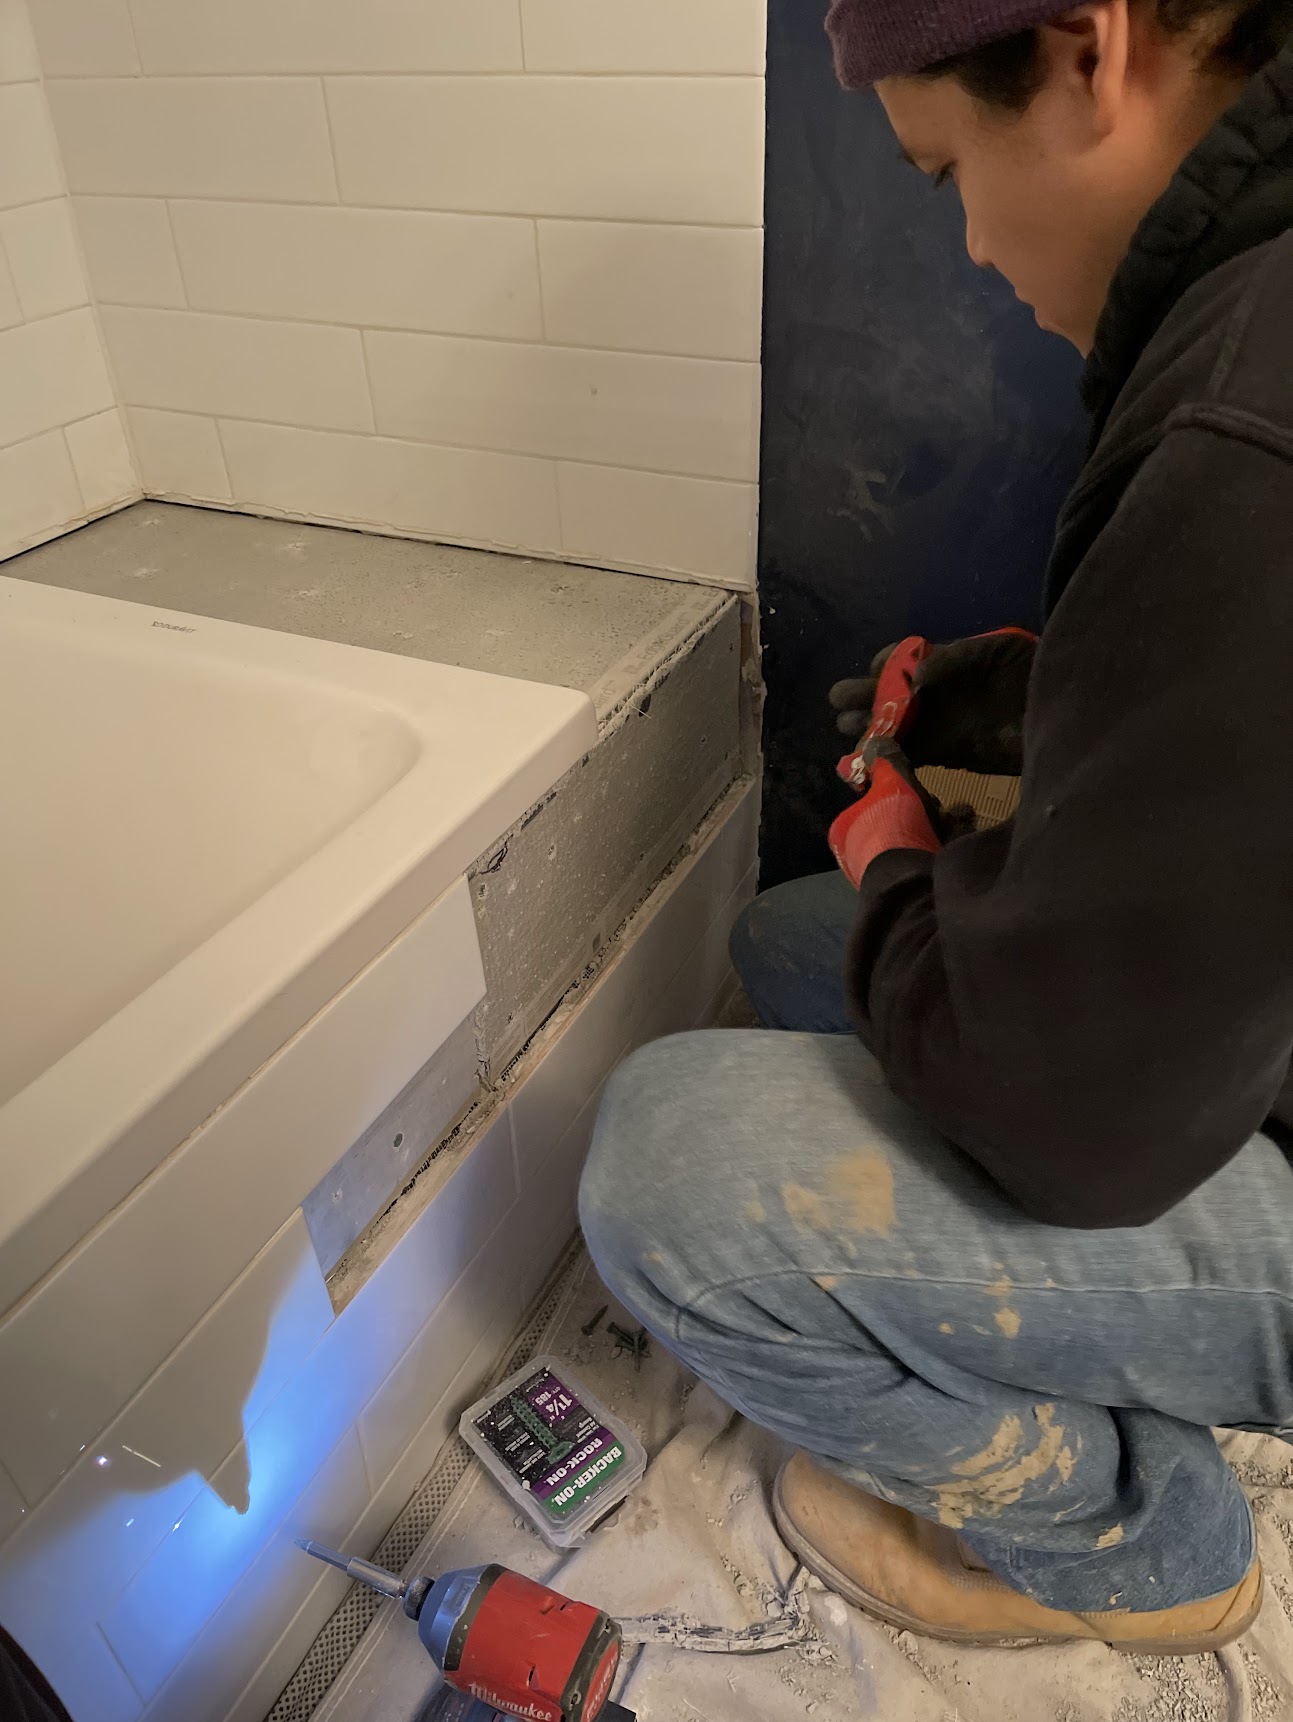
With the first flick of the scraper tool, the tiles start crumbling off the wall. Before I know it, I am looking right through the wall. I put my hand against the wall behind where the tile was, when I pulled away, my hand was dripping water. I explain to the owner that the walls need to be reinforced, and completely rebuilt with a waterproof membrane.

The Deeper I get the worse the condition is revealed. This doesn’t deter me. I rip open the wall and tear back to a point where I feel comfortable that I can get a good seal around the tile, and create a solid wall.

I’m not going to bore you with the details, because believe me, its a snooze fest. But suffice it to say, I left the bathroom in better condition than I found it and that is more than I can say for most bathrooms I visit just after thanksgiving.

Below you will find a photo of the finished bathroom tile installation. Chicago has a large spectrum of building and construction styles that have rolled through over the years. Its always fun to use an old structure, to make something modern clean, and structurally sound.

Well that’s all the big words I can think of today, I’ll catch up with you next time. Be sure to give me a call for an estimate on your Chicago tile installation. Cheers!

Here is the completed tile installation in the Chicago 3 flat. The White tile makes for a cleaner look, and brightens up the room a ton.

Do you need a permit?

In Chicago a permit is necessary for structural changes to a building. Most remodeling, tile, doorways, cabinetry and bathroom fixtures can be replaced without a permit. We have listed below the instances where it is not necessary to have a permit (source).


A building permit is NOT required for the following repair or replacement work at any building:


  • Interior finishes such as carpet, hardwood flooring, tile, paint and wallpaper
  • Interior non-fire rated ceiling tiles (excluding grid)
  • Cabinetry and furniture without electrical and plumbing connections
  •  In-kind replacement of non-fire rated interior doors
  • At grade non-combustible walkways and patios
  • Playground equipment
  • Fences max. 5’-0” high on private property (excludes landmark buildings and landmark districts as well as chain link and masonry fences)
  • Vinyl, aluminum, wood, EIFS or other similar nonstructural exterior finishes on all one story buildings except Hazardous occupancy (excludes landmark buildings and landmark districts)
  • A building permit is NOT required for the following construction or alteration work at any building:
  • Temporary tents max. 400 sq. ft. that comply with all zoning and construction type setback requirements and are not less than 2 feet from all property lines and not less than 6 feet from all residential buildings & erected for not more than 60 consecutive days


A building permit is NOT required for the following repair or replacement work in non-mixed use residential buildings (excluding hotels):


  • Shingle roofing with slope of 5 in 12 or steeper on residential buildings with max. of 3 dwelling units & 3 stories
  • In-kind replacement of non-fire rated doors/windows, hot water heaters, boilers, furnaces and AC condensers in buildings with max. of 3 dwelling units & 3 stories (excludes windows and exterior doors in landmark buildings and landmark districts)
  • In-kind replacement of toilets, sinks, faucets and tubs
  • Interior stairs in same location within a single dwelling unit
  • Not more than 1,000 sq. ft. of drywall without any alteration of underlying structural, plumbing, electrical or ventilation systems
  • Low voltage wiring for phones, speakers, burglar alarms, doorbells, thermostats and computers (excluding fire alarm systems)
  •  Replacement of not more than 250 bricks in buildings with max. of 3 dwelling units & 3 stories (excludes landmark buildings and landmark districts)
  • Vinyl, aluminum, wood, EIFS or other similar nonstructural exterior finishes on residential buildings not more than 3 stories in height (excludes landmark buildings and landmark districts)
  • A building permit is NOT required for the following construction or alteration work in residential buildings with 1-3 dwelling units:
  • Alteration of existing interior stair system with no change to existing stair opening in detached single family residences
  •  Alteration of low voltage wiring for phones, speakers, burglar alarms, doorbells, thermostats and computers inside non-mixed use buildings (excluding fire alarm systems)
  • Gazebos max. 150 sq. ft. (open air with roof and no walls) that comply with all zoning and construction type setback requirements and are not less than 2 feet from all property lines and not less than 6 feet from all residential buildings.  Combustible gazebos shall not be less than 3 feet from property lines.
  • Enclosed sheds max. 70 sq. ft. that comply with all zoning and construction type setback requirements and are not less than 2 feet from all property lines and not less than 6 feet from all residential buildings.  Combustible enclosed sheds shall not be less than 3 feet from interior property lines.  Only one enclosed shed is allowed per lot.

Note:  This does not constitute a waiver from the regulations of Title 13 (Building & Construction) and Title 17 (Chicago Zoning Ordinance) of the Municipal Code of Chicago. All construction must be code compliant.

A Tree Any Last Minute Christmas Decorator Can Pull Off

Merry Christmas Eve!

Screen Shot 2014-12-23 at 2.34.28 AM

First step of Spiral Christmas Tree by twistedtreeartist

I don’t know about you, but Christmas always seems to come up faster than I expect. And if you didn’t get the chance to go pick out a full evergreen or drag that fake tree out of storage, I have a quick, simple and cheap solution for you: The DIY Spiral Christmas Tree.

The supplies for this project (created by Reddit artist twistedtreeartist) are all items you probably have lying around your house. A simple square table, fishing line, a ceiling hook, wrapping paper and any and all Christmas decorations you have will do just fine.

Screen Shot 2014-12-21 at 9.49.04 PM

Base design by twistedtreeartist

Once you place the table where you want to display your tree, you will want to wrap the table’s surface in wrapping paper. Silver, gold or blue with a snowflake design, any wrapping paper will do. Then you will want to screw the hook in the ceiling securely. Make sure you align the center of the table with the center of where you want the tip of your tree to go for the most streamlined look.

To begin forming the shape of the tree, wrap the fishing line around the bottom of the tree, up and around the hook and then tie a knot to close the initial loop. Do not cut the fishing line. You will continue to wrap the fishing line around the table and hook until you have created a base for the tree.

In order to create spaces to hang your decorations, you will need to create spider web designs within the vertical lines. On the outer cone of the tree, you should pull together a few of the vertical strings, wrap them with more fishing line and then let it go, moving on to the next set of vertical strings. To secure the web, tie a few knots here and there to strengthen the web.

Screen Shot 2014-12-21 at 9.48.34 PM

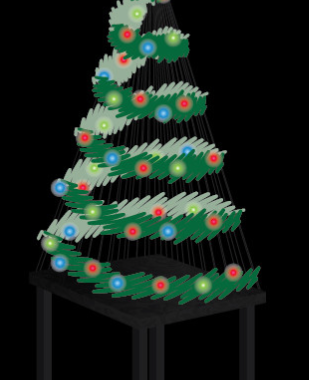
Final Design by twistedtreeartist

Now comes the best part: the decorating! If you’re going for a m0re modern look, use some silver garland and smaller blue or green lights. For the more traditional decorator, green garland with multi-color lights will look great as well. Wrap as much or as little as you want!

When you plug in the Christmas lights and turn off the overhead lighting, you will have a statement holiday tree that has the illusion of floating in space.

And to think, hours ago, you had a bland holiday-less space!

Need even more lighting for your holiday party? Check out Chicago Handyman’s electrical services!

Revamping The Standard Coffee Table

Screen Shot 2014-12-19 at 8.43.20 AM

Happy Holidays!

I’ve been thinking a lot about how to spice up an everyday DIY project. After all, there are a lot of examples of how to make your own coffee table, but how can you make one that is not only functional but a statement piece?

Tracing tree design onto wood by

Tracing tree design onto wood by iezugod

And that’s when I came across iezugod‘s tree design coffee table. This beautiful piece is not only intricate, but a pretty simple design to create on your own.

When you create the tree stencil, you want to make sure that it is large enough to be noticeable but not overpowering the rest of the table. Then you will trace the design on plywood with a pencil. You will want to cut the wood to the tree shape.


Screen Shot 2014-12-23 at 2.16.22 AM

Base & top of coffee table by iezugod


You can create the frame of the table before or after you create the tree shape. You will need 2×4’s for the legs and supports as well as screws for additional corner supports. You will then need a plywood board which you will attach trim to for a more refined look. The trim is also important so you can inlay plywood boards to surround the tree design. You will need to draw the same tree design on the boards so you can insert the tree in the center of the table. Then you will cut the design and remove the left over wood from the piece.

The next step is to stain the table in a dark cherry color. Then you will place the tree in the center inlay you have created. Once the parts are all assembled, apply polyurethane to the table top to add gloss to your piece.

Adding a stain to the table by iezugod

Adding a stain to the coffee table by iezugod

With that final touch not only have you added another surface to your living room, but a gorgeous art piece all your guests will ask about it.

And you can proudly say, “I made that!”

Looking to renovate the living room you can put this table in? Check out Chicago Handyman’s drywall and painting services! 

Home Improvements That Add Value To Your Home Infographic

If you’re looking to add value to your home before selling it or just to improve your living conditions here’s a nice infographic that shows you what home improvements provide the best return on your investment.

Some improvements that are relatively cheap like a fresh coat of paint can go a long way. Improving the plumbing and electrical in the home has the highest return but a remodeled bathroom and kitchen might help it sell faster and add value as well.

If you’re getting ready to put your Chicago Area home or commercial property on the market and would like to get as much as possible for it contact us and have us fix it up for you before you put it up for sale.

Home Improvements That Add Value To Your Home