Floating Headboard
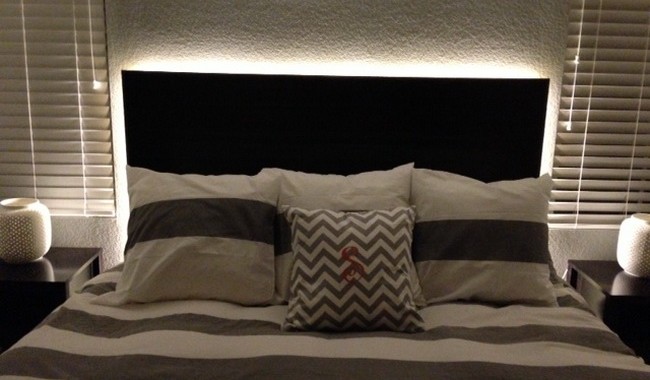
Reduce, Reuse, Recycle does not have to be boring. It can even be stylish. Following these simple steps from Remove & Replace, anyone can make an awesome, innovative floating headboard. All that’s needed are supplies from a previous project and a couple hours of work:
To begin, get these materials:
- Leftover walnut flooring
- 1/2″ MDF backing
- Oak wood trim
- 24″ stud mounted French cleats
- 15′ of string LED lighting
- Wiring to a dimmer switch
Start by mounting the slab of walnut flooring to the MDF backing. Then nail stud mounted cleats in the center of the area where the headboard will go. Follow this with nailing the oak wood trim to the border of where the slab will go.
Using attach brackets, add the LED lighting to the trim. Once the LED lighting is plugged in and the wiring is attached for the dimmer. Finally, mount the walnut flooring on MDF backing on the trim.
When this is completed, this floating headboard will not only make the room look more modern, but add another light source to a bedroom.


