Attention Music Lovers: A Home Improvement Project

Screen Shot 2015-01-02 at 12.41.11 PM

chillm wanted to spice up this bland space with some music

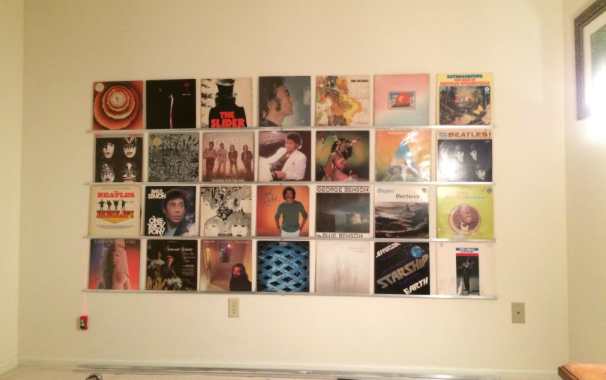
Music enthusiasts get a bad rap concerning home improvement. They love going to festivals or spinning their favorite records, but are not concerned with fixing up their bedrooms. This, of course, couldn’t be further from the truth and this vinyl album wall by chillm proves it. With this project, music and DIY work in harmony to create an awesome feature wall.

Screen Shot 2015-01-02 at 12.40.05 PM

Project supplies by chillm

First, get together supplies:

  • Five 8-foot aluminum slides
  • A laser level
  • An anchor kit of screws and bits
  • An electric drill
  • A selection of vinyl albums

After pulling these together, get to work on the first row. This should be approximately 18 inches above the ground, depending on the height of the walls in the room. Drill the first 8-foot aluminum slide into the wall with a drill on both ends. Make sure the slide is level before moving on to the next row.

Screen Shot 2015-01-02 at 12.40.22 PM

First row by chillm

When adding the next row, leave a space of at least 12 inches from the first row. In order to make sure there is enough room for the records to be displayed, slide the records into place on the first row. Measure this space several times before installing the second row, leaving little space between the records and slides for that seamless look. After several measurements, drill in the aluminum slides on both ends just like the first row.

The next 3 rows will require much less time measuring, but the same time installing. Place the vinyl albums in on each row, just to make sure the desired look is achieved. A step ladder may be needed for the last 2 rows.

With the last record in place, this statement wall displays both a music collection and great craftsmanship.

Screen Shot 2015-01-02 at 12.41.27 PM

Final feature wall by chillm

For other home improvement projects, keep checking back with Idea Corner!

Upcycle A Thrift Store Chair Without Losing The Vintage Charm

09-aqua-distressed-chair

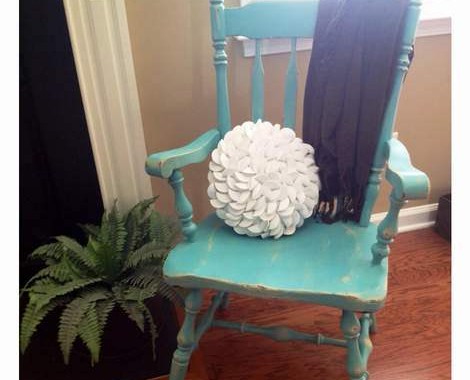
Some chairs have beautiful bones but need some help with aesthetics. Well luckily Camp Clem has a solution for any homeowner: a simple, inexpensive upcycling project for any thrift store chair find. 

These are the required supplies to take any chair from drab to fab:

  • Sander
  • Primer
  • Tan paint
  • Paint brush
  • Sponge Brush
  • Aqua paint
  • Sand block

The first step is to sand down the chair lightly. Then, prime the chair completely.

04-aqua-distressed-chair

Once primed, paint the chair with tan to show through for that aged look. When dry, apply a coat of aqua with a sponge brush.

05-aqua-distressed-chair

06-aqua-distressed-chair


For that distressed look, utilize a sand block on the surface of the entire chair. This will cause the tan and original wood color to show through. To show extra wear, locate the areas of most wear on the original chair before beginning this project.

08-aqua-distressed-chair

When completed, this project will result not only in a pop of color but a dash of vintage as well!

A New Twist On An Old Calendar

Q9wWBB3

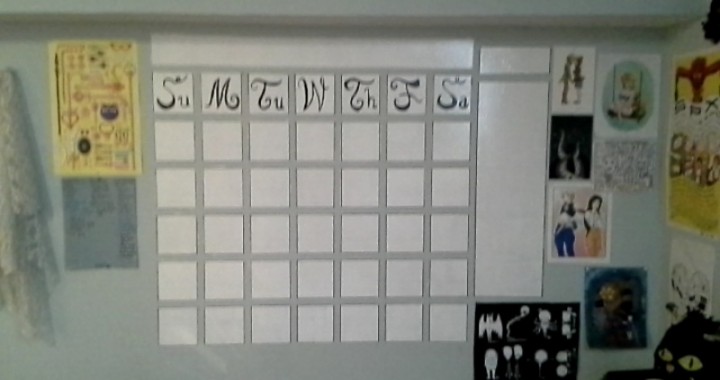
A perfect calendar accent for any wall by princessdoki

s9ZnlMx

Grid outline by princessdoki

Some people need more reminders than others to stay on schedule. Sure there are phone notifications or daily planners to keep on track, but this dry erase calendar will definitely do the job. All that’s required for this project is dry-erase paint, painter’s tape, black acrylic paint and black marker to bring this large scale creation to life.

Using a calendar as a guideline, create a grid for the month, days and dates to be written in. Draw this outline on the wall in pencil and a ruler or go straight for the painter’s tape and a ruler. For extra flair, add a notes section like Reddit user, princessdoki, to keep track all tasks for the month.

OhxPg1d

After removal of painter’s tape by princessdoki

Once the grid is outlined, apply an even coat of dry erase paint over the squares. Unfortunately, the paint takes 7 days to dry. Use this time to paint the days of the week into the top 7 squares.

After waiting a week, feel free to add the month, dates and any notes. This week-long project will not only help manage schedules and “to-do’s,” but add visual interest to any wall in a home.

ir1ZtkA

Final product by princessdoki

For any project involving the walls in your house, you’ll need the best drywall application possible. Call Chicago Handyman for all your drywall needs!

Smart Technology Meets Old-Fashioned Biking

Chicago’s becoming a biking city. Whether you’re a casual bike rider, a daily bike commuter or bike exerciser, the Hammerhead bike navigation unit adds sophistication and smart technology to your bike riding experience. With a simple Bluetooth connection, the Hammerhead will get you to your destination quickly and safely.

After attaching the Hammerhead to your handlebars and downloading the app, you will immediately streamline your biking experience. The LED lights point you in the right direction without distracting you from the road. Meanwhile, Bluetooth navigation will guide you away from any traffic and get you where you need to go faster.

With new shipments available in February, you’re going to want to get in on this $85 deal. Check out the video below for a closer look at this innovative product.

Top 5 Need To Know Tiling Tips

5wxw951f034fe71637

Getting ready to tile a bathroom shower? Maybe the kitchen floors need some revamping? Tiling is a fairly simple home project, but can seem daunting for novice home renovators. Well to ensure the project is done right the first time, here are 5 tips to absolutely follow:

1. Keep Those Tiles Dry- And Clean!


nqwky51f034ff466ae

Before beginning to place tiles in the desired pattern, make sure all the tiles are dry and clean. This will be a time and sanity saver throughout the course of the project.


2. Read The Directions On The Box!

everbuild_FWPOWGROUT1

Don’t be a fool- read the adhesive box directions. Just because The Property Brothers makes a kitchen tile install look simple doesn’t mean it is. View the box directions not as guidelines but as law.


3. On That Note- Wait The Full 24 Hours!

Mid_Tiling__jpg_465x600_q85

Any adhesive box will instruct to wait 24 hours until grouting the tiles of any home project. Not 12 hours, not 16 hours. Keep heartache out of the remodel, wait a whole day before finishing up the tiling project.


4. Use A Notched Trowel & Horizontal Patterns

PiBacksplash10

When applying adhesive and grout, there’s no need to get artistic or elaborate. Save that for craft time with the kids. Using a notched trowel, apply the material in horizontal lines, making sure to cover the tile entirely. No swirl shapes allowed!

5. Tiles Are Like Vampires, They Hate Sunlight

Cortico-Netos-ceramic-store-Lisbon-Portugal

For the love of all the DIY gods, do not store the tiles in direct sunlight before fixing them. A dry, clean room with no windows is preferred.


And for even more tiling rules, check out Joanna Johnson’s Golden Rules of Tiling.