The Easiest Way To Improve A Mirror: Add A Frame

plcaz53a7630cb0c7d

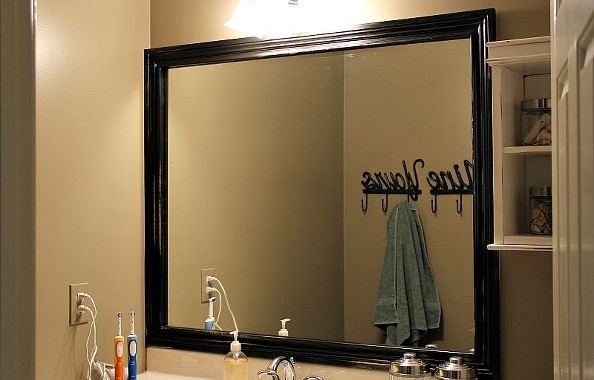
A remnant of home decoration past, for some reason, many bathrooms have a frameless mirror. This style is not just ugly, but it can make even the best remodeled bathroom look unfinished. With just a few supplies and tools, turn any half-remodel into a full one with time and money to spare.

Visit a local hardware store and pick up these items:

  • Prime case moulding
  • Liquid glue
  • Paint

vi7rp53a763182d03b

First, measure the length and width of the mirror and cut the moulding to size. Lay it out on the floor to gauge what the final arrangement will look like.

This next step isn’t necessary, but can add another element of class to any bathroom. Depending on the style of bathroom, neo-Victorian or country classic, paint the trim to match its overall decor. Shaunna from hometalk settled on black for a timeless appearance.

4jari53a76311690ef

Lastly, attach the moulding to the mirror with liquid glue. Directions should be on the packaging and make sure to not use too much. Globs of glue are even less attractive than no framing at all. Use painters tape to keep it secure until the glue dries.

And that’s it! A combination of moulding and adhesive brings any bathroom remodel from ordinary to exceptional in just a few steps.

766u353a7630a599b1

Need more ideas for remodeling? Check out Idea Corner weekly for home renovation ideas.

Speak Every Lingo: Get The Trype Keyboard For Free

trype-keyboard

Just met some new bilingual friends? Need to send a text to an international business associate? Looking to freshen up on the high school language you’ve most likely forgotten?

Well, the Trype Keyboard makes this possible. And for a limited time, it’s free!

This user friendly app allows you to type in any message and the keyboard will simultaneously translate the text into any of its 80 languages in its database.

So get ready for any & all communications with the Trype Keyboard!


Concrete Countertops: Get The Popular Look On A Budget

fDSC_0513copy

Concrete countertops are all the rage in home renovation. Not only is the style industrial, but easier to clean than the more expensive granite or marble. Despite being seemingly cheaper, concrete countertops can run pretty steep. So instead of getting a slab professionally installed or taking the copious amount of time to create concrete forms, get the same aesthetic by applying concrete over pre-existing countertops.

IMG_4314

Here are the needed supplies:

  • 10-pound bag of Ardex Feather Finish
  • Course-grit sandpaper
  • Drywall knife
  • Putty knife
  • Finish sealer
  • Paint brush

IMG_4321

To start the process, sand down the previous counters with the course-grit sandpaper to create a perfect surface for the concrete to settle on. Following this, mix the Ardex Feather Finish and water until it reaches a semi-thick consistency.

IMG_4340

Once the mixture is prepared, apply multiple thin layers to the countertop’s surface. For 100 percent coverage, 3 or 4 layers will most likely be required. To ensure a durable surface, sand thoroughly between each application.

IMG_4348

When these layers are dry, use the putty knife to clean up any mixture that splattered onto walls and create natural texture in the surface. Depending on the desired look, feel free to sand the surface until trowel marks show through or until a smooth concrete look is achieved.

IMG_4379

Finally, pour the sealer over the concrete making sure it soaks through thoroughly before using a paint brush to remove any residue.

IMG_4384

So for just $15 and a few hours, concrete countertops aren’t only affordable but achievable without any back breaking hard work.

dDSC_0693

Get the detailed tutorial from The Little Green Notebook.

In search of quality service for more kitchen remodels? Contact Chicago Handyman today!

The Very Best Wall Improvement: A DIY Wall Niche

modern-wall-niche-model

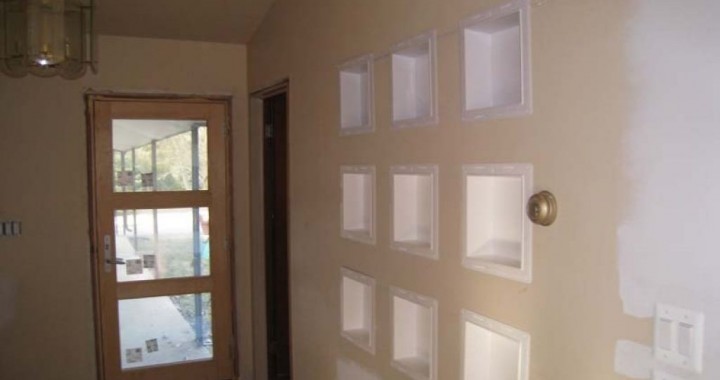
Want to add texture to a wall? Don’t want to use simple wallpaper or paneling? Try embellishing with a wall niche. Display pictures, knick knacks, even the 3rd grade soccer trophy that never got thrown out.

Begin by choosing a wall for the niche, noting that the niche must be installed over one wall stud and between two other wall studs.

dttr205_4fa_lead

After marking out the area, utilize a hammer to knock out the drywall. Once the drywall is removed, level cut of all the wall studs and then nail 2X4 blocks on either side of where the niche box will be.

Now it’s time to create the box. Measure the dimensions of the wall cavity and length and width of where it will be installed. Secure the pieces together with wood glue, making sure to wipe away any remaining glue. After priming the box, paint it in the chosen color and caulk all the joints.

dttr205_4fb_lead

Place the box in the wall and then nail it into the wall with a nail gun. Once it is secure, attach trim and rosettes around the border of the niche. Finally cover up any cracks or joints with caulk.

dttr205_4fc_lead

When completed, this niche adds classic charm to any wall.


For more information on this project, check out DIY network.


Say Cheese! This QardioBase Will Bring A Smile To Your Face

No one likes getting on the scale. But sometimes, it’s necessary. Whether for health improvement or just to simply be aware of your body, a scale can help determine where your health goals should be.

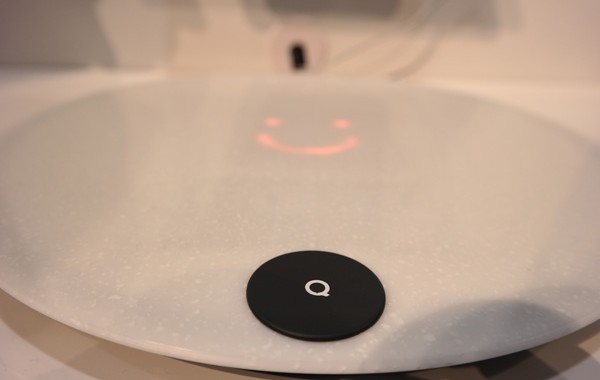
QuardioBase is an innovative smart scale that smiles or frowns based on the weight on the scale. This scale not only determines weight but body, muscle, water retention and even body mass index (BMI).

This scale is not only intelligent but is easy on the eyes and won’t take up much space in the bathroom.

It may cost $149 but it definitely worth the cost. So get ready for spring with this new smart tool!

qardiobase4