Light Up The Room, Build An LED Light Table!

How-To-Build-An-LED-Light-Table_10

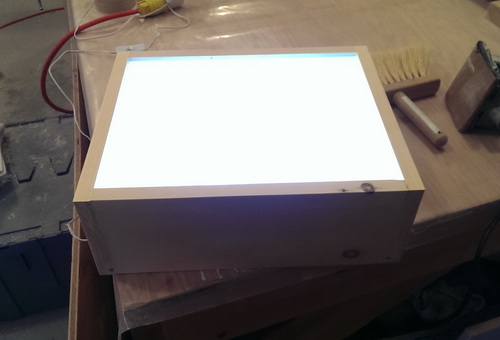
Happy Monday, Chicago Handyman readers! Ready for a great summer project? Need to light up a room and hate the messy cords of floor lamps or harsh overhead lighting? Well, build an LED Light Table and resolve those problems in just a few hours and $50.

Start by getting together these materials:

  • Wood
  • 3 or 4 strip LED light kit
  • Frosted sheet of plexiglass
  • 3M tape
  • Wood glue
  • Wood clamp

How-To-Build-An-LED-Light-Table_04

Gather together the wood and make sure each side is notched. Then gut a groove into the top of the wood where the plexiglass will go. Slide the wood sides together and fit in the plexiglass to make sure everything is the correct size.

How-To-Build-An-LED-Light-Table_05

At the bottom of the box, drill a hole for the power cord to slip through and attach to the wall. Tape down the 4 LED strips using 3M tape. Test the lights to make sure the wiring is working properly.

How-To-Build-An-LED-Light-Table_07

How-To-Build-An-LED-Light-Table_08

Finally, glue together all the pieces of the wood box using wood glue and utilize wood clamps so it dries quickly and efficiently.

With this final step, the LED table is complete and ready to be gawked at by guests.

For a complete set of instructions, check out Remove and Replace’s article on building an LED light table.

Top 3 Water Features To Liven Up A Backyard This Summer!

Summer is finally around the corner! And that means barbecues, summer breezes and many more people chilling out in the backyard. But don’t worry, Chicago Handyman’s got it covered.

Here’s the top 3 water features to enhance any backyard into an oasis:

1. Outdoor Fireplace

water_feature_circular_pool.jpg.rend.hgtvcom.1280.960

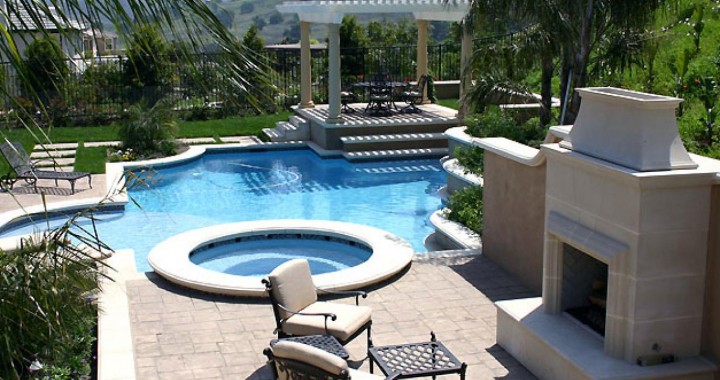
Heat up a cool summer night with a cozy fireplace. This won’t only make getting out of the pool more bearable, but provide a second living space!

2. Pond Niche

water_feature_bamboo_fountain.jpg.rend.hgtvcom.1280.960

No need for an overstated feature. Instead, create a quaint reflective space in the yard by tucking a bamboo and stone pond in the corner.

3. Bubbling Containers

water_feature_pot_fountains.jpg.rend.hgtvcom.1280.960

These beautiful fountains can be attained on any budget. Buy one at the hardware store or convert a garden container into this water feature.

Want more ideas? Check out HGTV’s article on budget-friendly water features.


Top 3 Kitchen Backsplash Trends For 2015

Last week, Chicago Handyman posted about the latest wall trend: ombre wall paint! Now here are 3 of the most anticipated kitchen backsplash trends of the 2015 home improvement season:

1. Natural Stone

Stone 2With an earthy look and refined lines, natural stone can add visual interest and texture to a sleek kitchen.

2. Stainless Steel

Stainless Steel 2

Stainless steel appliances are becoming standard in every kitchen, and it’s starting to make its way into backsplashes as well. Modern and reflective, a stainless steel backsplash can breathe life into even the most neutral of kitchens.

3. Chalkboard

Chalkboard - comfylittleplace.blogspot.com

A chalkboard backsplash can change a room with a simple line of chalk. From reminders to kid’s drawings, chalkboard backsplashes add charm and an artistic vibe to any kitchen.

For more ideas, check out ImproveNet for their article on even more 2015 kitchen backsplash trends.


The Best Way To Add Vintage Flair To A New Home: Chair Railings

How-to-Install-Chair-Rail

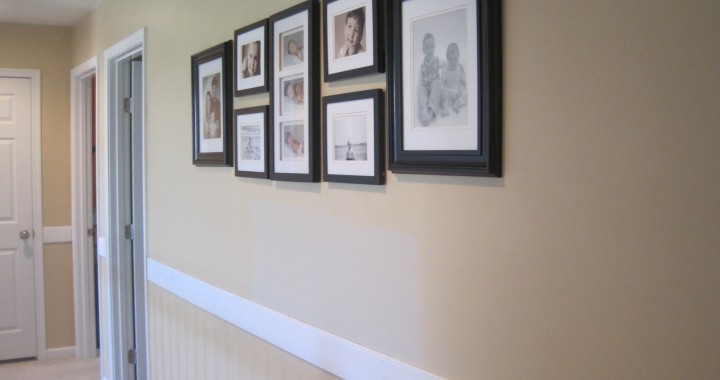
New homes, no matter how pristine or innovative, often miss that vintage charm. Well, look no further than installing a chair rail to bring class back to the dining room. Follow this simple tutorial from A Pinch Of Joy about how to install a chair railing in any room and recreate the glamour of yesteryear with the convenience of the 21st century.

Start by measuring the lengths of the walls in the selected room. Determine the longest run in the room and purchase all moulding and trim in this length (8ft, 10ft or 12ft).

Once the moulding and trim are bought, measure 38.5 inches from the floor up the wall. Then draw a line across the whole length of the wall, using a carpenter’s or laser level to double check that the line is straight.

chalk-line

To begin installing, start at an inside corner. Measure this to the door, window or following corner and begin making cuts to the molding and trim as necessary. Doors and windows require straight cuts, inside corners require 45-degree angles and outside corners require 30-degree angles. Then start to nail! Putting the trim above or below the line drawn, apply a nail to moulding or trim every 12 to 18 inches. Repeat until the whole room is surrounded in chair rail!

Chair-Rail4

For the finishing touches, fill the nail holes with caulk or joint compound. After the material dries, sand the chair rail smooth. Finally, paint the chair rail in the desired color.

When done, host a dinner party and watch guests be impressed by an old world charm in a brand new home.

IMG_3523

Freshen Up A Wall-Mounted TV, Add A Frame!

Screen Shot 2015-04-29 at 12.18.49 AM

No matter how fancy or hi-tech a TV is, it will always just be another household appliance. To make a TV into a moving image art piece, consider framing the screen with this easy home project from Remodelaholic.

Start by gathering items from the hardware store or local lumber yard:

  • Recycled wood boards
  • 4 wooden corner blocks
  • Drill
  • Nails
  • Hammers

IMG_0525_thumb

To begin the project, cut the four wood boards for the sides of the frame. Lay down 4 wooden corner blocks on the outside corners, and nail through the mitered edges of the frame.

Screen Shot 2015-04-29 at 12.17.21 AM

To add dimension, add bead wood to the inside of the frame. Following this addition, add another set of wood boards to the outside edges of the frame to cover the edges of the TV.

Screen Shot 2015-04-29 at 12.17.40 AM

Finally, drill 6 holes along the top of the frame for the TV’s ventilation. Then all that’s left is to slide the frame over the mounted TV.

Screen Shot 2015-04-29 at 12.18.13 AM

Don’t settle for a great TV, enhance the viewing experience with a stylish, wooden TV frame.

Screen Shot 2015-04-29 at 12.18.36 AM