These Vents Are Beautiful & Smart, What A Find!

KeenHomeSmartVent

Ever wish you could just pay for the heating and cooling that you actually use, not for the rooms that are never entered, like the home gym? Well look no further than Keen Home’s Smart Vent!

These vents self-adjust to each individual room’s climate, ensuring that a home’s temperature is balanced. And if you think that’s cool, these Smart Vents are customizable to your home, coming in and adding more styles all the time.

Installation, you ask? Super easy! Don’t believe the hype? Feast your eyes on the video below!

https://youtu.be/vHVXtUFjt9c

Upcycle A Thrift Store Chair Without Losing The Vintage Charm

09-aqua-distressed-chair

Some chairs have beautiful bones but need some help with aesthetics. Well luckily Camp Clem has a solution for any homeowner: a simple, inexpensive upcycling project for any thrift store chair find. 

These are the required supplies to take any chair from drab to fab:

  • Sander
  • Primer
  • Tan paint
  • Paint brush
  • Sponge Brush
  • Aqua paint
  • Sand block

The first step is to sand down the chair lightly. Then, prime the chair completely.

04-aqua-distressed-chair

Once primed, paint the chair with tan to show through for that aged look. When dry, apply a coat of aqua with a sponge brush.

05-aqua-distressed-chair

06-aqua-distressed-chair


For that distressed look, utilize a sand block on the surface of the entire chair. This will cause the tan and original wood color to show through. To show extra wear, locate the areas of most wear on the original chair before beginning this project.

08-aqua-distressed-chair

When completed, this project will result not only in a pop of color but a dash of vintage as well!

Revitalize Any Tire Into A Rope Ottoman!

rope-ottoman-final

Now that winter’s over, it may be time to change a car’s tires. However, don’t simply recycle those away. Instead, revitalize one of those tires into a modern, stylish rope ottoman. In just a few simple steps from Handimania, anyone can build an eco-friendly ottoman and bring a home’s interior design to a whole new level. 

rope-ottoman-step01

Get together these supplies:

  • Tire (New or Old)
  • 6mm MDF cut into two 55cm diameter circles
  • Drill
  • Screwdriver
  • 6 screws
  • Twisted Cord
  • Glue Gun
  • Cloth
  • Scissors
  • Brush Sealer

Start by thoroughly cleaning the tire with a cloth. Then drill one MDF into the tire at three points on the edge of the circle, making sure to puncture through the rubber of the tire. Follow this up by tightly screwing in screws to all three holes. Repeat the previous steps on the other side of the tire.

rope-ottoman-step03

Now comes the rope! Take the hot glue gun and adhere some glue into the center of the circle. Press the tip of the rope to the center and begin snaking the rope around the center in a circular motion.

rope-ottoman-step05

Once the top is covered, continue roping around the edge of the tire, tightly fastening the rope to the edge. Then turn the tire over and follow this process through. Cut off the rope once the whole tire is coated completely.

rope-ottoman-step06

rope-ottoman-step08

Finally, seal off the ottoman with a brush and place it anywhere in a home.

rope-ottoman-step09

The Best Dresser To Mudroom Bench Transformation Ever!

1-img_1040

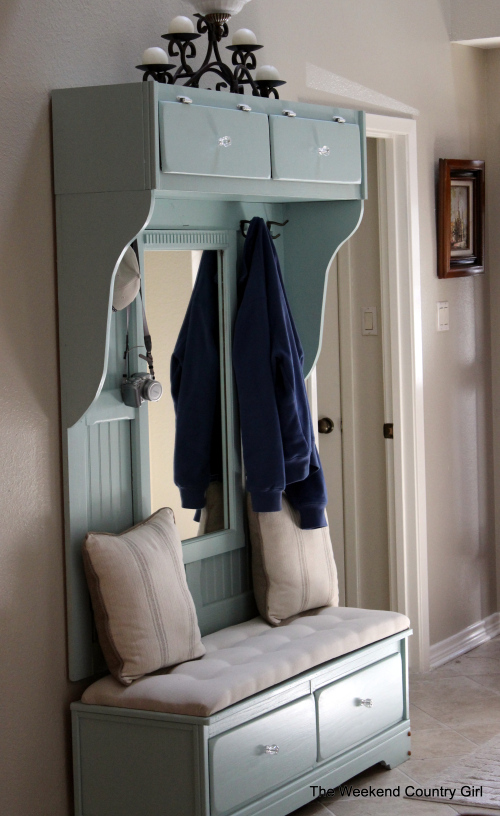
Dressers can be bulky and in this closet organization age, they’re pretty unnecessary. But don’t ditch the dresser in the alleyway wasteland! Instead, repurpose any dresser into a sleek, sophisticated mudroom bench for every household need following The Weekend Country Girl’s comprehensive guide. 

Here’s what’s needed:

  • Old Dresser
  • Plywood slabs
  • 2X4’s
  • Plywood box
  • Beadboard paneling
  • Paint
  • Cushion


100_05753
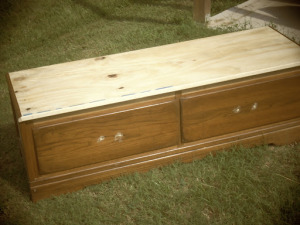
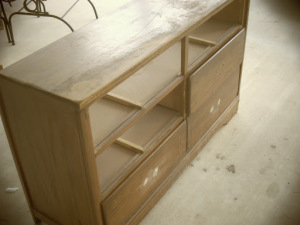
Begin by taking apart the dresser. Remove all of the drawers, leaving only the two remaining bottom drawers. Attach a plywood top to create a surface for the bench. This structure will not only serve as seating, but storage for shoes and other household items.

100_05971

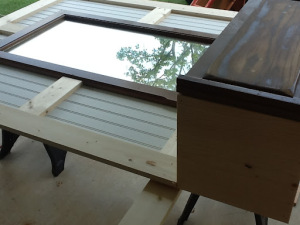
To create the top space for hanging jackets and stashing papers, reuse the remaining solid drawer fronts. Once adhered at the top, make sure to attach breadboard paneling for aesthetics and several 2X4’s and a plywood box for support. For an even more glamorous look, add a mirror to the center and add 2X4’s around it for support.

mudroom51

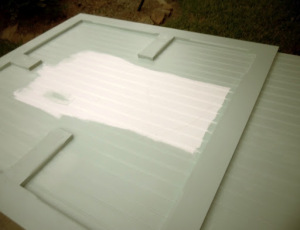
Finally, to connect the pieces, just insert some board-and-batten bead board to the wall for a fluid illusion. Then comes the fun part: paint it, add drawer knobs and install hooks. Make them whatever is consistent with the style of the home.

100_11031

When all is said and done, this project is not only really simple, but extremely environmentally and style friendly.