Why Go To The Bar When You Could Build Your Own?

Screen Shot 2015-02-04 at 12.18.17 AM
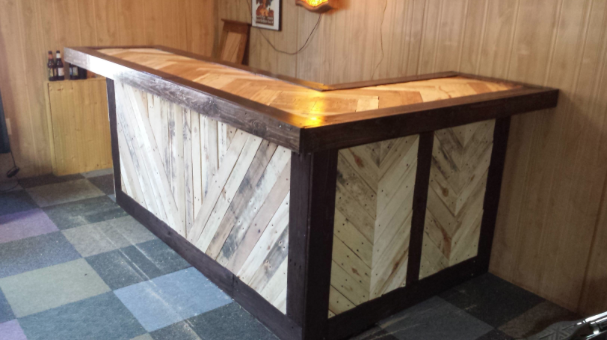
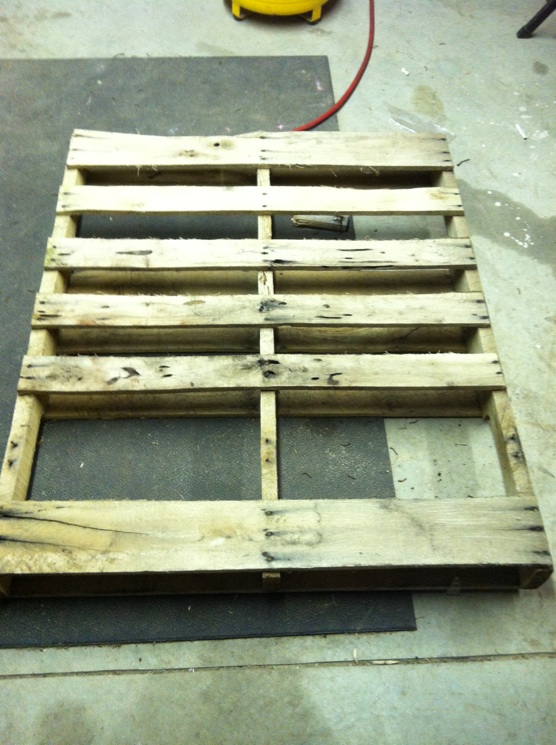
Going to the bar is expensive. Along with the $10 cover, it’s $20 for a couple of beers and the inevitable cab ride home. So why not pocket the $50 for a night out and instead pay less than $40 for an at-home bar to provide years of entertainment? By repurposing some old wood and purchasing only the building supplies, it is totally possible!

Besides the repurposed wood, these supplies are required:

  • Sheathing
  • Screws
  • Stain
  • Polytheurane
  • Saw

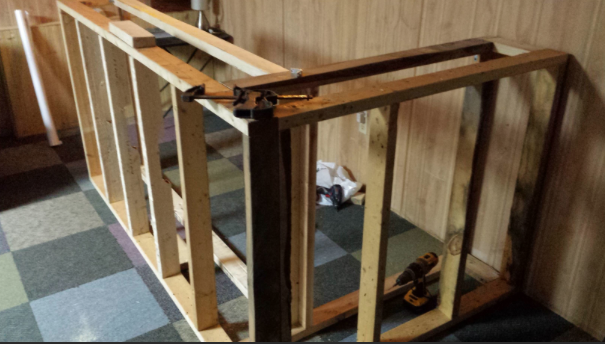
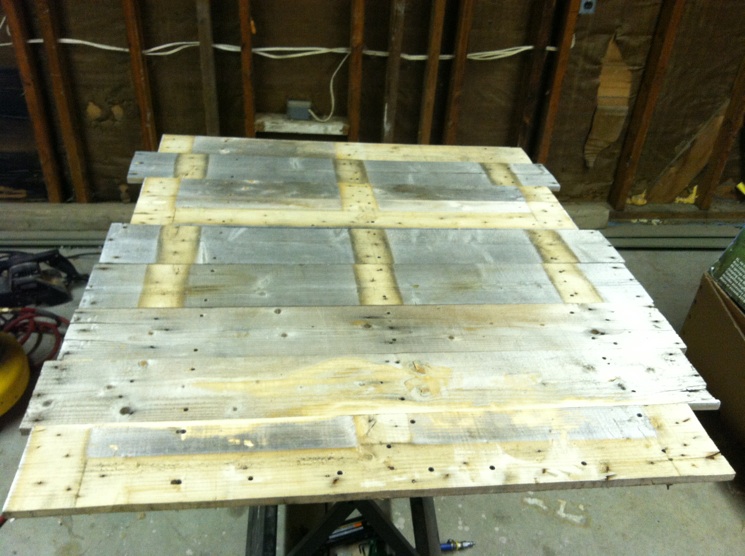
Start by framing the bar, using 16″ centers. Create the sides of the bar by attaching sheathing to the frame. Reddit user 7thsonwoodworking found those pieces at a gas station, but can also be found at a local building site or hardware store for free with just a couple “please and thank you”‘s.

Screen Shot 2015-02-04 at 12.18.40 AM

Use plywood for the surface of the bar and screw wooden boards to the surface for the 12″ overhang of the bar. These will also serve as the frame for the inlays. Screen Shot 2015-02-04 at 12.19.01 AM

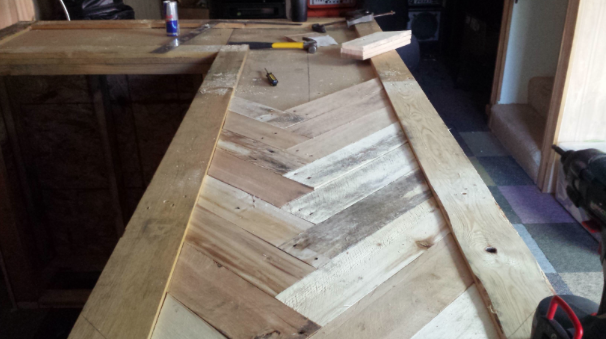
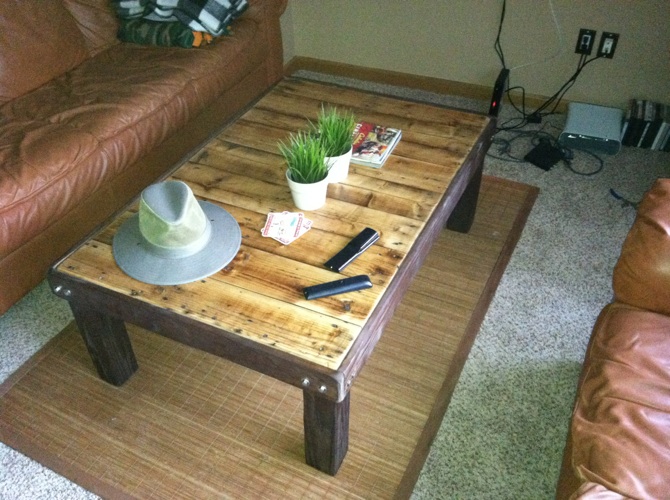
In order to create a chevron badocams look with the inlays on the surface, measure and cut each board so each side matches up to make the arrow shape. Do this until reaching the middle where both sides meet up. Get creative for this section, 7thsonwoodworking decided on a geometric pentagon shape, but any shape to fill the space will do. Similarly, the fronts and sides should also possess these designs. Screen Shot 2015-02-04 at 12.19.18 AM

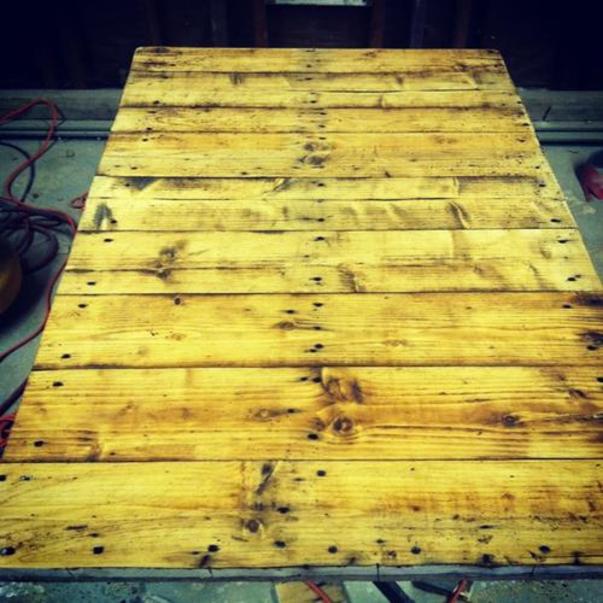
Stain the trim of the surface, front and sides until reaching the desired hue. Once stained, screw all the corners of the inlays in. This will be the longest step in the process. Attach the trim to the surface, sides and front. Finally add a layer of polytheurane to make the bar shiny, crisp and clean. Screen Shot 2015-02-04 at 12.19.31 AM

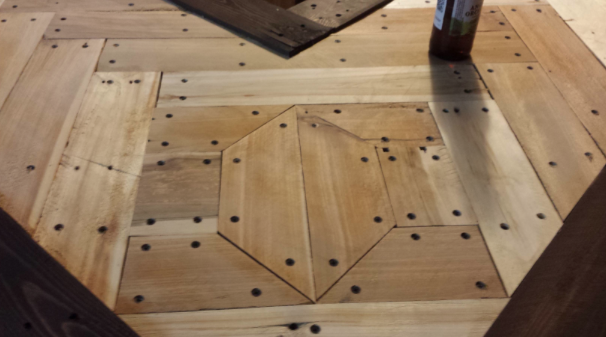
For the advanced class, build some shelving behind the bar to keep all needed liquor and garnishes nearby. This finished look will have people wanting to party in a basement for the first time since high school.

Be nice, and no matter how tempting, don’t charge a cover.
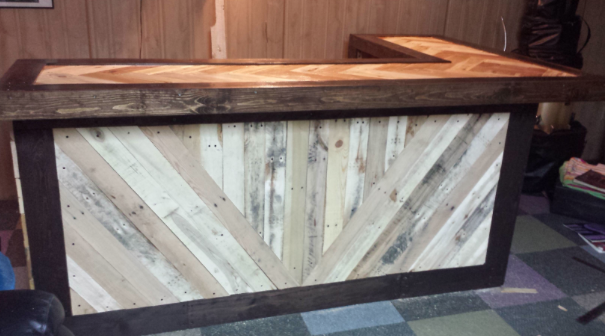
 Screen Shot 2015-02-04 at 12.19.47 AM

Hide Any Ugly In The Home With A Hinged Canvas

IMG_0888

Not every necessary utility in a home is cute to look at. Fire alarms? Thermostats? Security systems? Those clunky squares aren’t a good look.

Luckily, The Third Boob has a great idea to hide those unsightly objects, a hinged canvas of any painting or photo. In just a few steps, the walls will look great and these systems will be easily accessible.

Start by gathering these materials:

  • Chosen canvas
  • Two flat hinges
  • Screw driver

After picking out the perfect painting of a sunset or photo of the family, attach two flat hinges the top and bottom of one side of the canvas. Once attached to the canvas, secure the hinges to the wall. Make sure to screw the hinges tightly to ensure the safety of the system and stability of the canvas.

IMG_0890

IMG_0891

And that’s it! Enjoy large scale beauty without any of the nuisances of utilities cluttering up wall space.

IMG_0889

A Rustic Touch For Any Home

G9aqK

Whether a home is a modern oasis or vintage abode, a rustic piece of furniture can add a natural luster to any room. And instead of paying through the roof in a furniture showroom, follow the steps of Reddit user BaconStripsandFishin to make a pallet coffee table.

OguV9

While the look may look difficult to attain, the supplies and steps are surprisingly simple!

This project requires the following materials:n1hyc

  • A wood pallet
  • Sander
  • Plywood
  • Wood for legs and sides
  • Saw
  • Walnut stain
  • 16 lag screws
  • Leftover coffee

To begin, acquire a wood pallet. These can be acquired for free or low cost at a local hardware store, lumber yard or construction site. While there, pick up the rest of the needed products. Except for of course, the coffee. In order to get the desired weathered look, the table will need to be stained with coffee once a day for a month. Any coffee can be used, Colombian, Hazelnut, etc.

dOt5n

First, disassemble the wooden pallet. Arrange the boards on the plywood and then nail them to each other with the nails pulled from the pallet.

Following assembly, sand the surface of the table until smooth but still weathered and cut the sides to the desire size. Once constructed, then begin the monthlong staining process with coffee. Meanwhile, stain the wood for the legs and sides with a walnut stain. The contrast of the tones will add a contemporary flair.

Once all the pieces are dry and fully stained, attach them to each other with the 16 lag screws. Check for stability and if shaky, add a few extra lag screws.

When finished, this furniture piece will be functional and add strong character to all living spaces.

qPUIR

Interested in a full home remodel? Call Chicago Handyman for a quote today!