Give A Deck A Face Lift With Eco-Friendly Decking Tiles!

100887582.jpg.rendition.largest

Summer is here and in Chicago that means three things: baseball, tourists and backyard shindigs. As for the last on that list, Chicago Handyman has shared some valuable deck building tips before, but for those with not enough time or energy to take on the task, there’s finally a solution: decking tiles!

100631789.jpg.rendition.largest

100631788.jpg.rendition.largest

These easily installed tiles take almost no time to install and cover up any weathered wood, concrete or soil. All that’s required is snapping them together and voila! This cost-saving, eco-friendly deck solution makes a backyard looks absolutely inviting. And the focus is finally back on the barbecue… not the ugly wood below guests’ feet.100498157.jpg.rendition.largest


For a list of more decking tile options, check out Better Home & Gardens wide array of choices. 

Ready for a brand-spanking-new deck? Call Chicago Handyman today for all summer decking needs!

Even More Eco-Friendly Flooring!

DSC06989

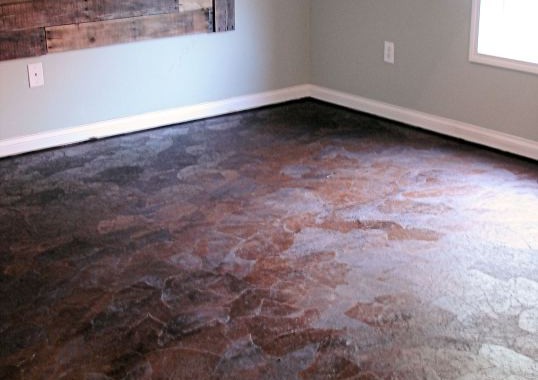
Previously, Chicago Handyman gave some tips on installing cork flooring, a very eco-friendly option indeed. Ready for an even cheaper, more eco-friendly flooring? Brown Paper Bags!

Sure, it sounds a little bit like a kindergarten art project, but it is actually a great floor and puts those lunch sacks to use.

To start, gather these materials:

  • Brown craft paper/brown paper bags
  • Gallon of Elmer’s Glue
  • Small bucket
  • Paint brush
  • Roller tray
  • Stain
  • Floor Grade Polyurethane
  • 3″ chip brush

While this may seem like a long list, it’s actually pretty affordable at under $100 and can be used for up to two or three rooms.

Wood-filler

Following shopping, prepare the floors for the material. Whether this means pulling up ratty carpet or shorty wood, do so. Then sand down any high spots in the subfloor, removing nails and filling in any gaps.

Once the subfloor is prepped, begin tearing up pieces of the brown paper, separating straight edged ones from the more choppy. These pieces should be between 6″-12″ diameter and once torn, balled up and put aside until application.

Brown-paper-Decoupage

With the Elmer’s Glue ready, begin to paint the first area on the floor with the glue and then put 5-6 paper balls in the glue mix. Dunk them quickly, squeeze them and set them aside until they reach the floor.

Then start laying the pieces! For a more natural look, overlap the pieces bit by bit. Make sure to watch out for tears or inconsistencies.

Finally, using an extension pole, apply the stain and poly to the new flooring. This will be the longest part of the process because both steps need ample time for drying.

When dry, this green, durable flooring will not only help the environment, but ignite dinner party conversation.

Stained-Paper-Floor

Need more details? Check out Lovely Crafty Home for a step-by-step guide.

Looking for more flooring? Call Chicago Handyman for a quote on floor installation today!

The Best Way To Reuse Old Picture Frames

DIY-Frame-Shelves-500x750
Everyone knows the struggle: too many picture frames, not enough photos. After all, why print out those memories when there’s the instant gratification of Facebook and Instagram likes and comments? Well, struggle no more! Get ready to put those picture frames to use with these frame shelves.

Start by removing the glass, backing and hardware from all the frames intended for this project. Next, gather some 1×4 boards and cut them to size to make the sides of the the shelving box.

Glue-for-frame-500x750

Building-a-frame-shelf-500x670

To form the box, add lines of Gorilla glue to each side and nail each side together. Then apply wood glue to the back of the frame and lay it on top of the box. Nail 1 1/4″ nails through the frame and into the box to secure the shelf together.

Box-for-Frame-Shelf-500x750

Nail-Frame-to-Box-500x750

Frame-Shelf-How-To-500x750

Before painting the shelf to match the frame, fill any holes with wood filler. Use spray paint to apply the shelving’s coat of paint.

When dry, adhere at least 3 command strips to the back of each shelve.

Command-Strips-500x750

Lastly, hang them on the desired wall. Enjoy these stylish and eco-friendly shelves in any home today!

For a more comprehensive overview of the frame shelve project, check out Shanty 2 Chic.

Create A Floating Headboard with Old Flooring

Floating Headboard

diy-headboard-with-led-lighting_2

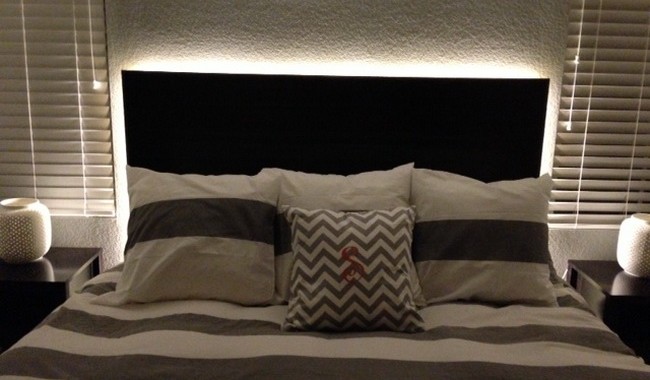
Reduce, Reuse, Recycle does not have to be boring. It can even be stylish. Following these simple steps from Remove & Replace, anyone can make an awesome, innovative floating headboard. All that’s needed are supplies from a previous project and a couple hours of work:

To begin, get these materials:

  •  Leftover walnut flooring
  • 1/2″ MDF backing
  • Oak wood trim
  • 24″ stud mounted French cleats
  • 15′ of string LED lighting
  • Wiring to a dimmer switch

Start by mounting the slab of walnut flooring to the MDF backing. Then nail stud mounted cleats in the center of the area where the headboard will go. Follow this with nailing the oak wood trim to the border of where the slab will go.

diy-headboard-with-led-lighting_4

Using attach brackets, add the LED lighting to the trim. Once the LED lighting is plugged in and the wiring is attached for the dimmer. Finally, mount the walnut flooring on MDF backing on the trim.

diy-headboard-with-led-lighting_5

When this is completed, this floating headboard will not only make the room look more modern, but add another light source to a bedroom.

diy-headboard-with-led-lighting_1

Handyman At Home: Top 5 Ways To Go Green At Home

RX-DK-DIY020003_green-house-labeled_s4x3_lg

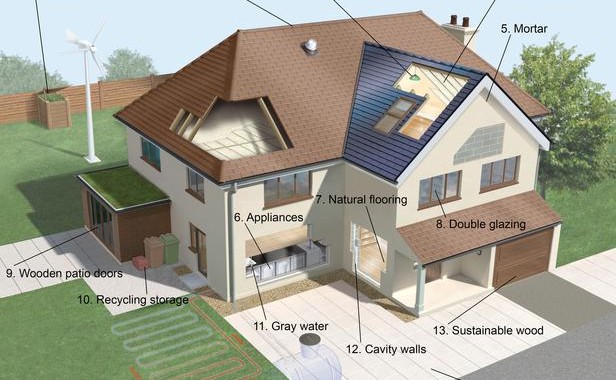
Going green is not only great for the future of the earth, but also homeowners’ wallets! There are many simple, easy purchases and home renovations to make any home, from an apartment to a mansion, a greener place to be.

Here are the top 5 ways to go green at home:

1. Composting

Three stage compost bin in backyard

Don’t throw away food, revitalize it! Composting is a great way to turn left-overs and yard weeds into reusable energy- fertilizer.

2. Recycled Roof Tiles

valor___gray_slate

Need a new roof? Don’t fall for the new roof tiles on the market. Use reclaimed clay, stone or slate tiles to create a greener roof.

3. Energy Efficient Appliances

15473_energy_star_hero

If shopping for a new dishwasher or laundry machine, look for the energy efficient models. This investment may cost more initially but saving on energy bills later will surely be worth it.

4. Natural Flooring

cork-flooring-1

There are a lot natural materials that can serve as a great alternative to hardwood flooring. Check out our previous article about installing cork flooring for ideas!

5. Recycling System

all-in-one-recycling-system-1

The easiest way to go green in the home? Start recycling! With just a few bins, it’ll be much easier to create a green contribution.

Need more green at home ideas, check out DIY Network’s full list of green home solutions